Week 8: Establishing an arc of inquiry
Current research question:
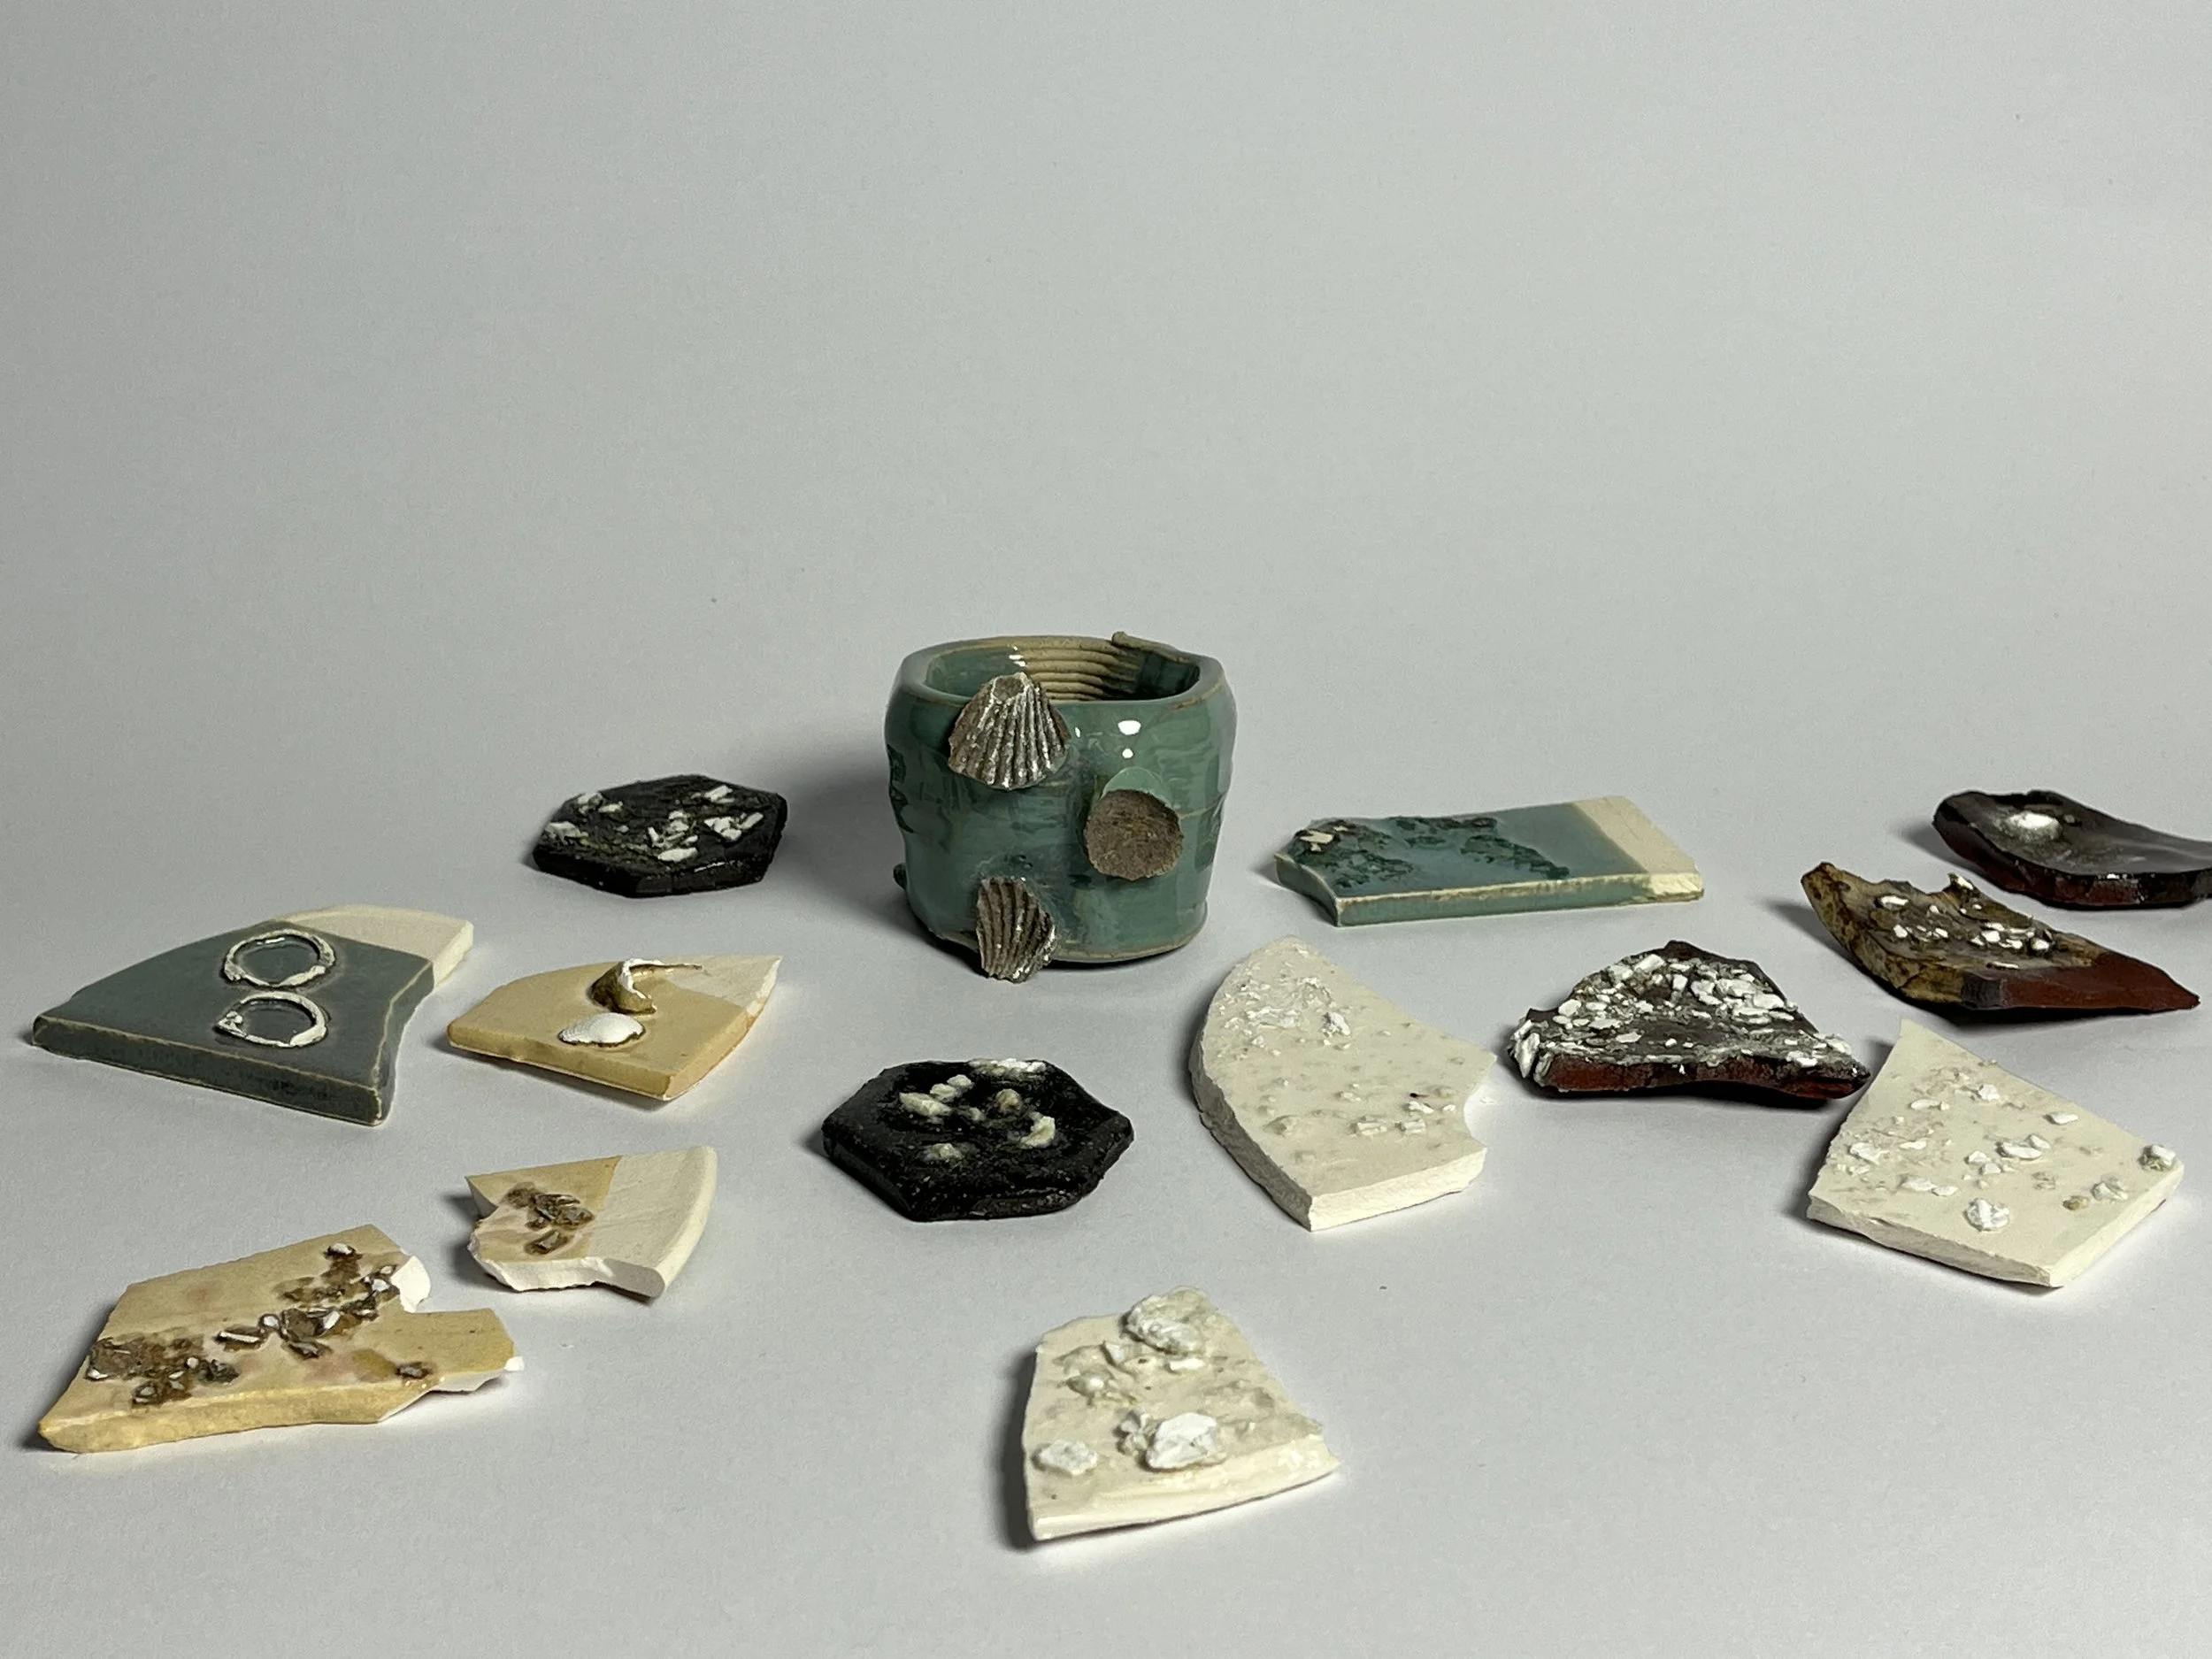
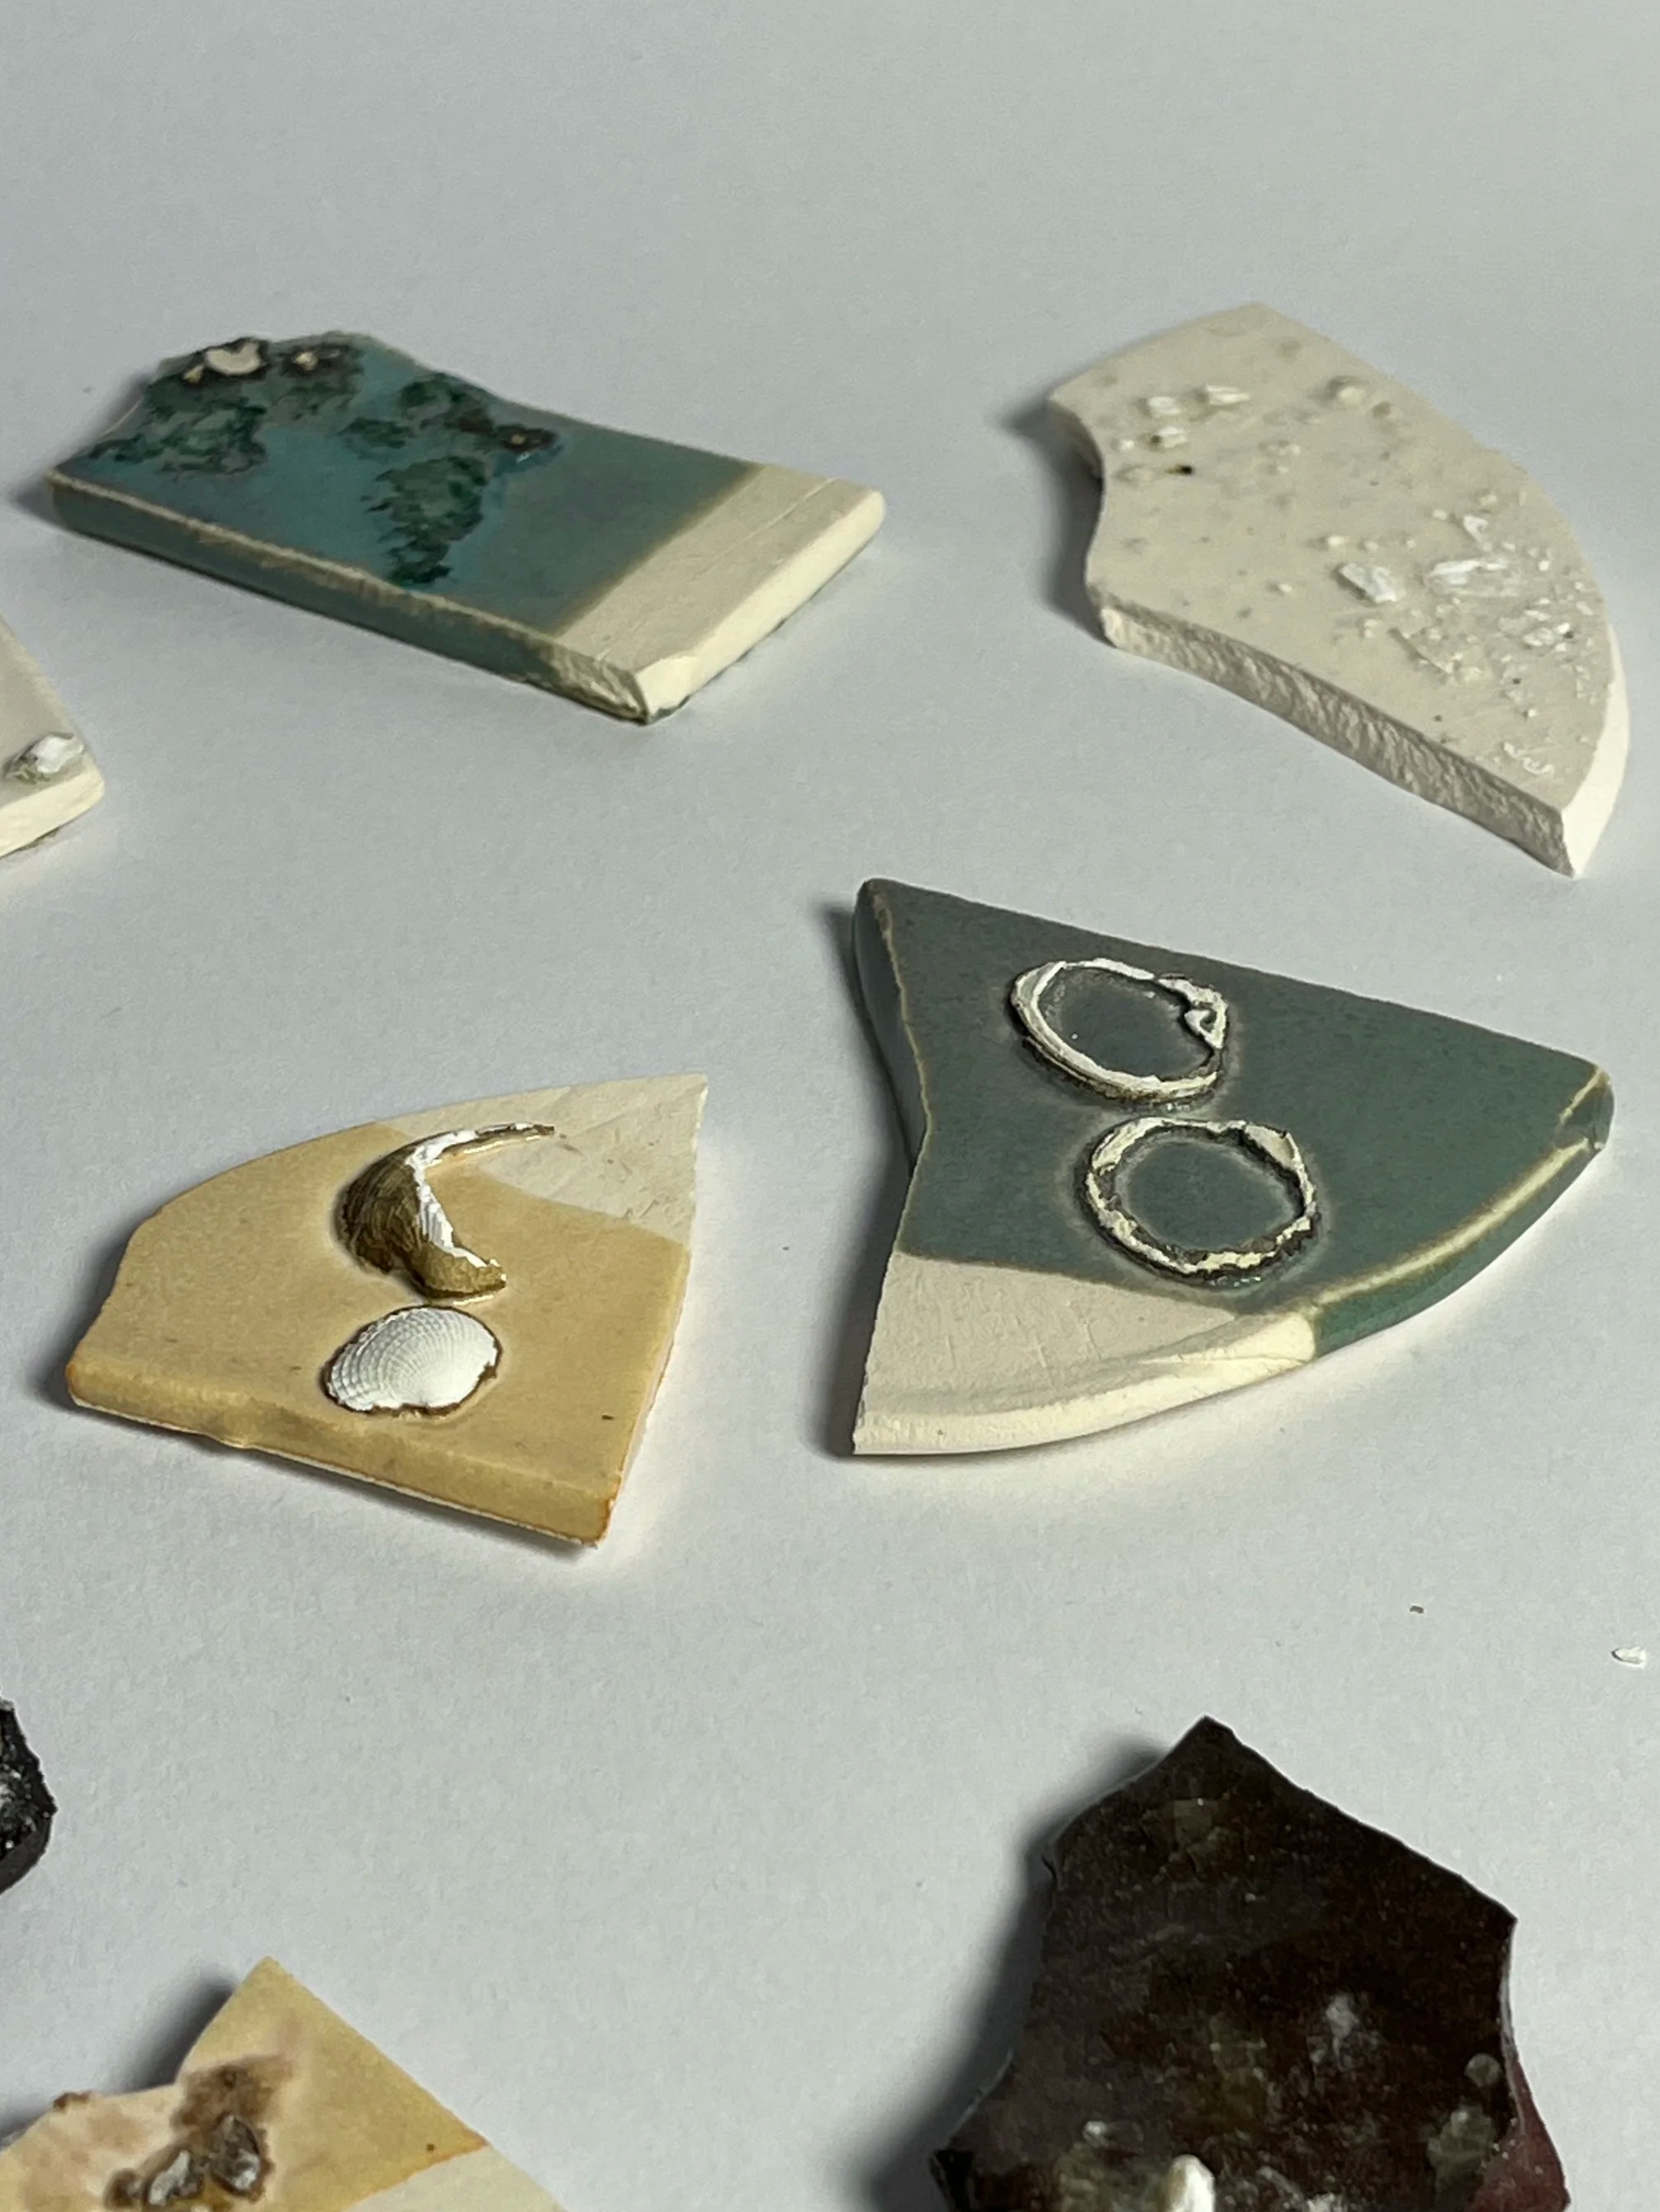
Figure 1. Ceramic glaze experiments with sea shells [Photograph]. Note. Photographed by author
How can a material story be told of Kina (New Zealand sea urchin) in homeware design, to provide comfort and familiarity to a space?
Updated timeline
During a one-on-one catch-up with Sue, we discussed that my timeline may be too ambitious for this short proof-of-concept project. Particularly as researching and gathering four different materials will take a long time, seeing as I am already struggling to start making, due to the lack of these materials. I was suggested to work with more familiar, accessible materials or to limit the number to just one or two.
In Design Practice 1, I had already explored familiar materials, so my goals for this second half were to be more explorative and research with materials outside of my comfort zone. Also, given that my project is framed as a material-driven design project, I still wanted to keep the
element of quick explorations of different material properties each week. But I also agreed that gathering many new materials in a short amount of time would be unrealistic.
Through further research into locally available materials, I grew increasingly interested in Kina. So, with all the above considerations, I reframed my project and timeline to focus on just one material, Kina. This will narrow down the scope further, simplify the material-gathering stage, and allow me to explore much deeper.
Here is the updated proof-of-concept timeline. Instead of finding 4 different materials and researching the properties of each, I would experiment with 4 different properties of Kina.

Figure 2. Updated proof of concept timeline [Diagram]. Note. Made by author on Miro.
Seashells and ceramics
To gauge which materials processes were available to me, I headed to the wet labs to talk with the technicians. Although I didn’t have kina shells available to me at that point, I had some seashells left over from Design Practice 1, so bringing them over led to a discussion of the relationship between shells and ceramics. This proved to be more relevant to my research than I initially thought, because I found out that kina shells are mainly composed of the same calcium carbonate as the sea shells I had (NIWA, 2025; Woods Hole Oceanographic Institution, n.d.).
One of the technicians mentioned that calcium carbonate powder is also commonly used in glaze to stabilise the mixture. It acts as a flux, lowering the glaze's melting temperature, resulting in a smoother, glossier finish while improving durability and aesthetic qualities (Decopot Limited, n.d.). I thought there was a really interesting connection there and naturally chose to focus on experimenting with ceramic glaze this week. Specifically, using my seashells as a substitute for the stabiliser.
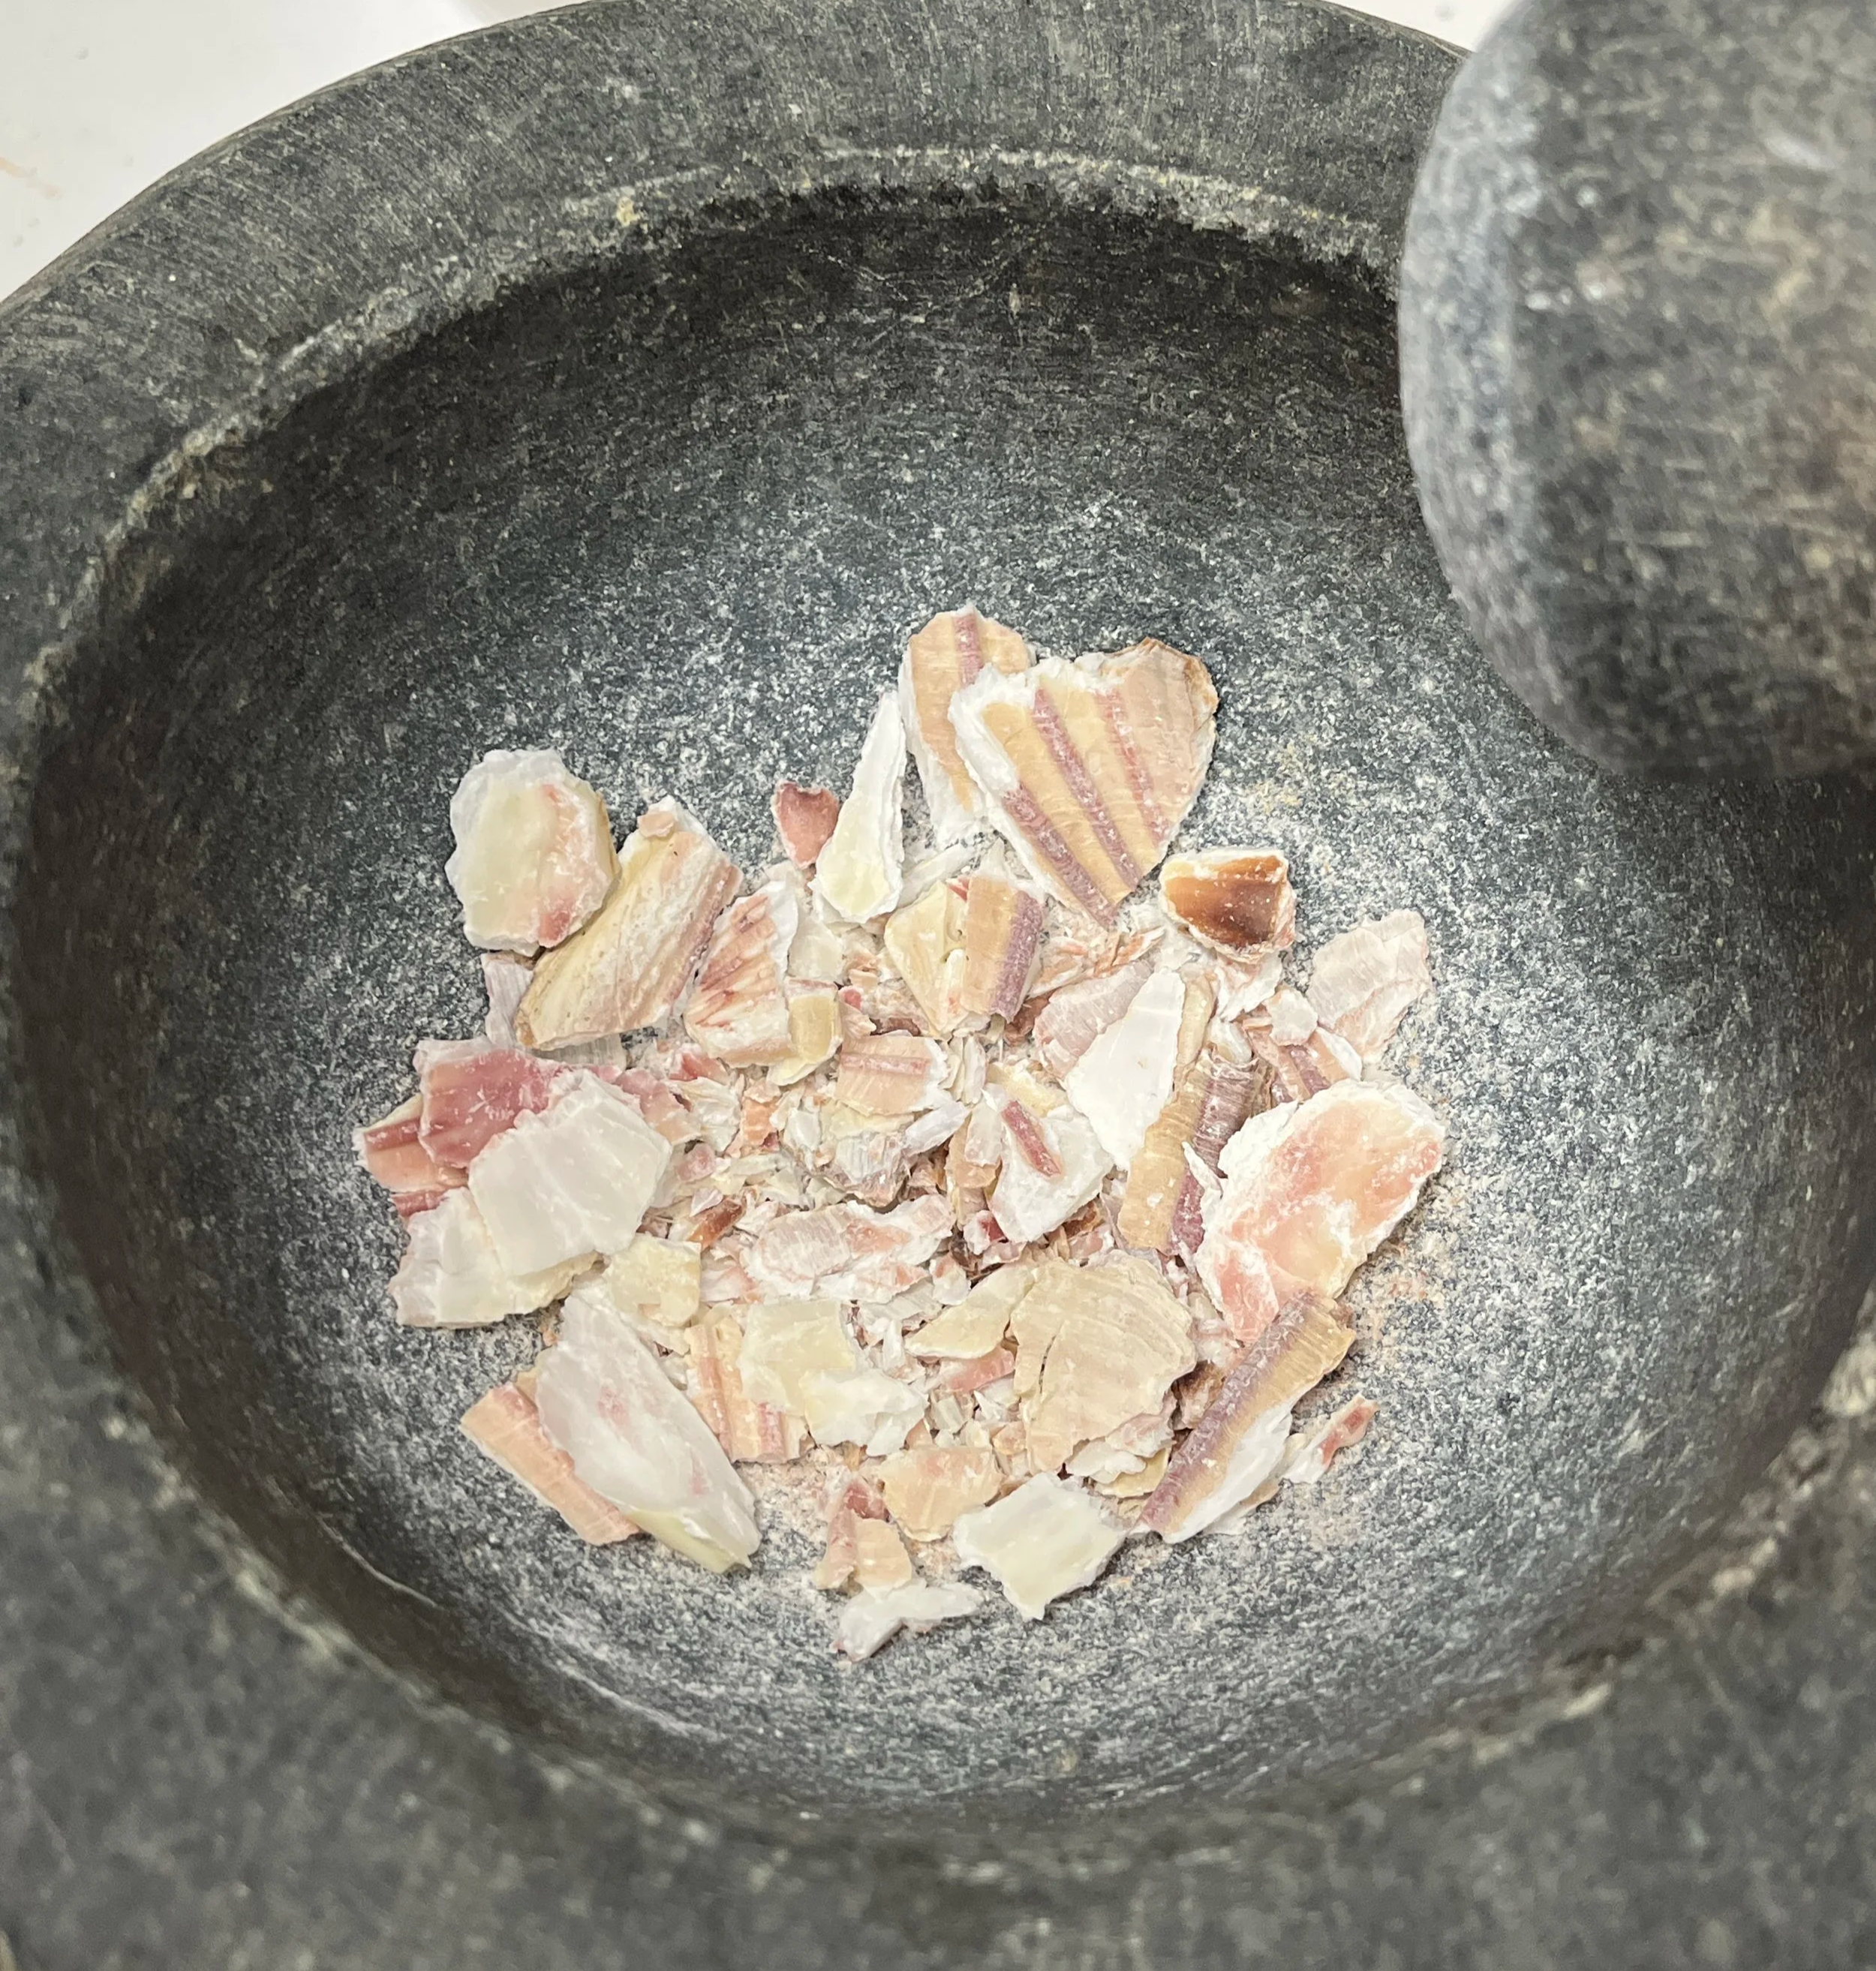
I started off by crushing shells to different sizes, from finely ground to leaving some chunky parts, to see if this affects the outcome. With the small number of shells I had, I wanted to experiment with as many different methods as possible. Here is what I tried:
Figure 3. Crushing sea shells with a mortar and pestle [Photograph]. Note. Photographed by author
Mixing crushed shells into a clear glaze
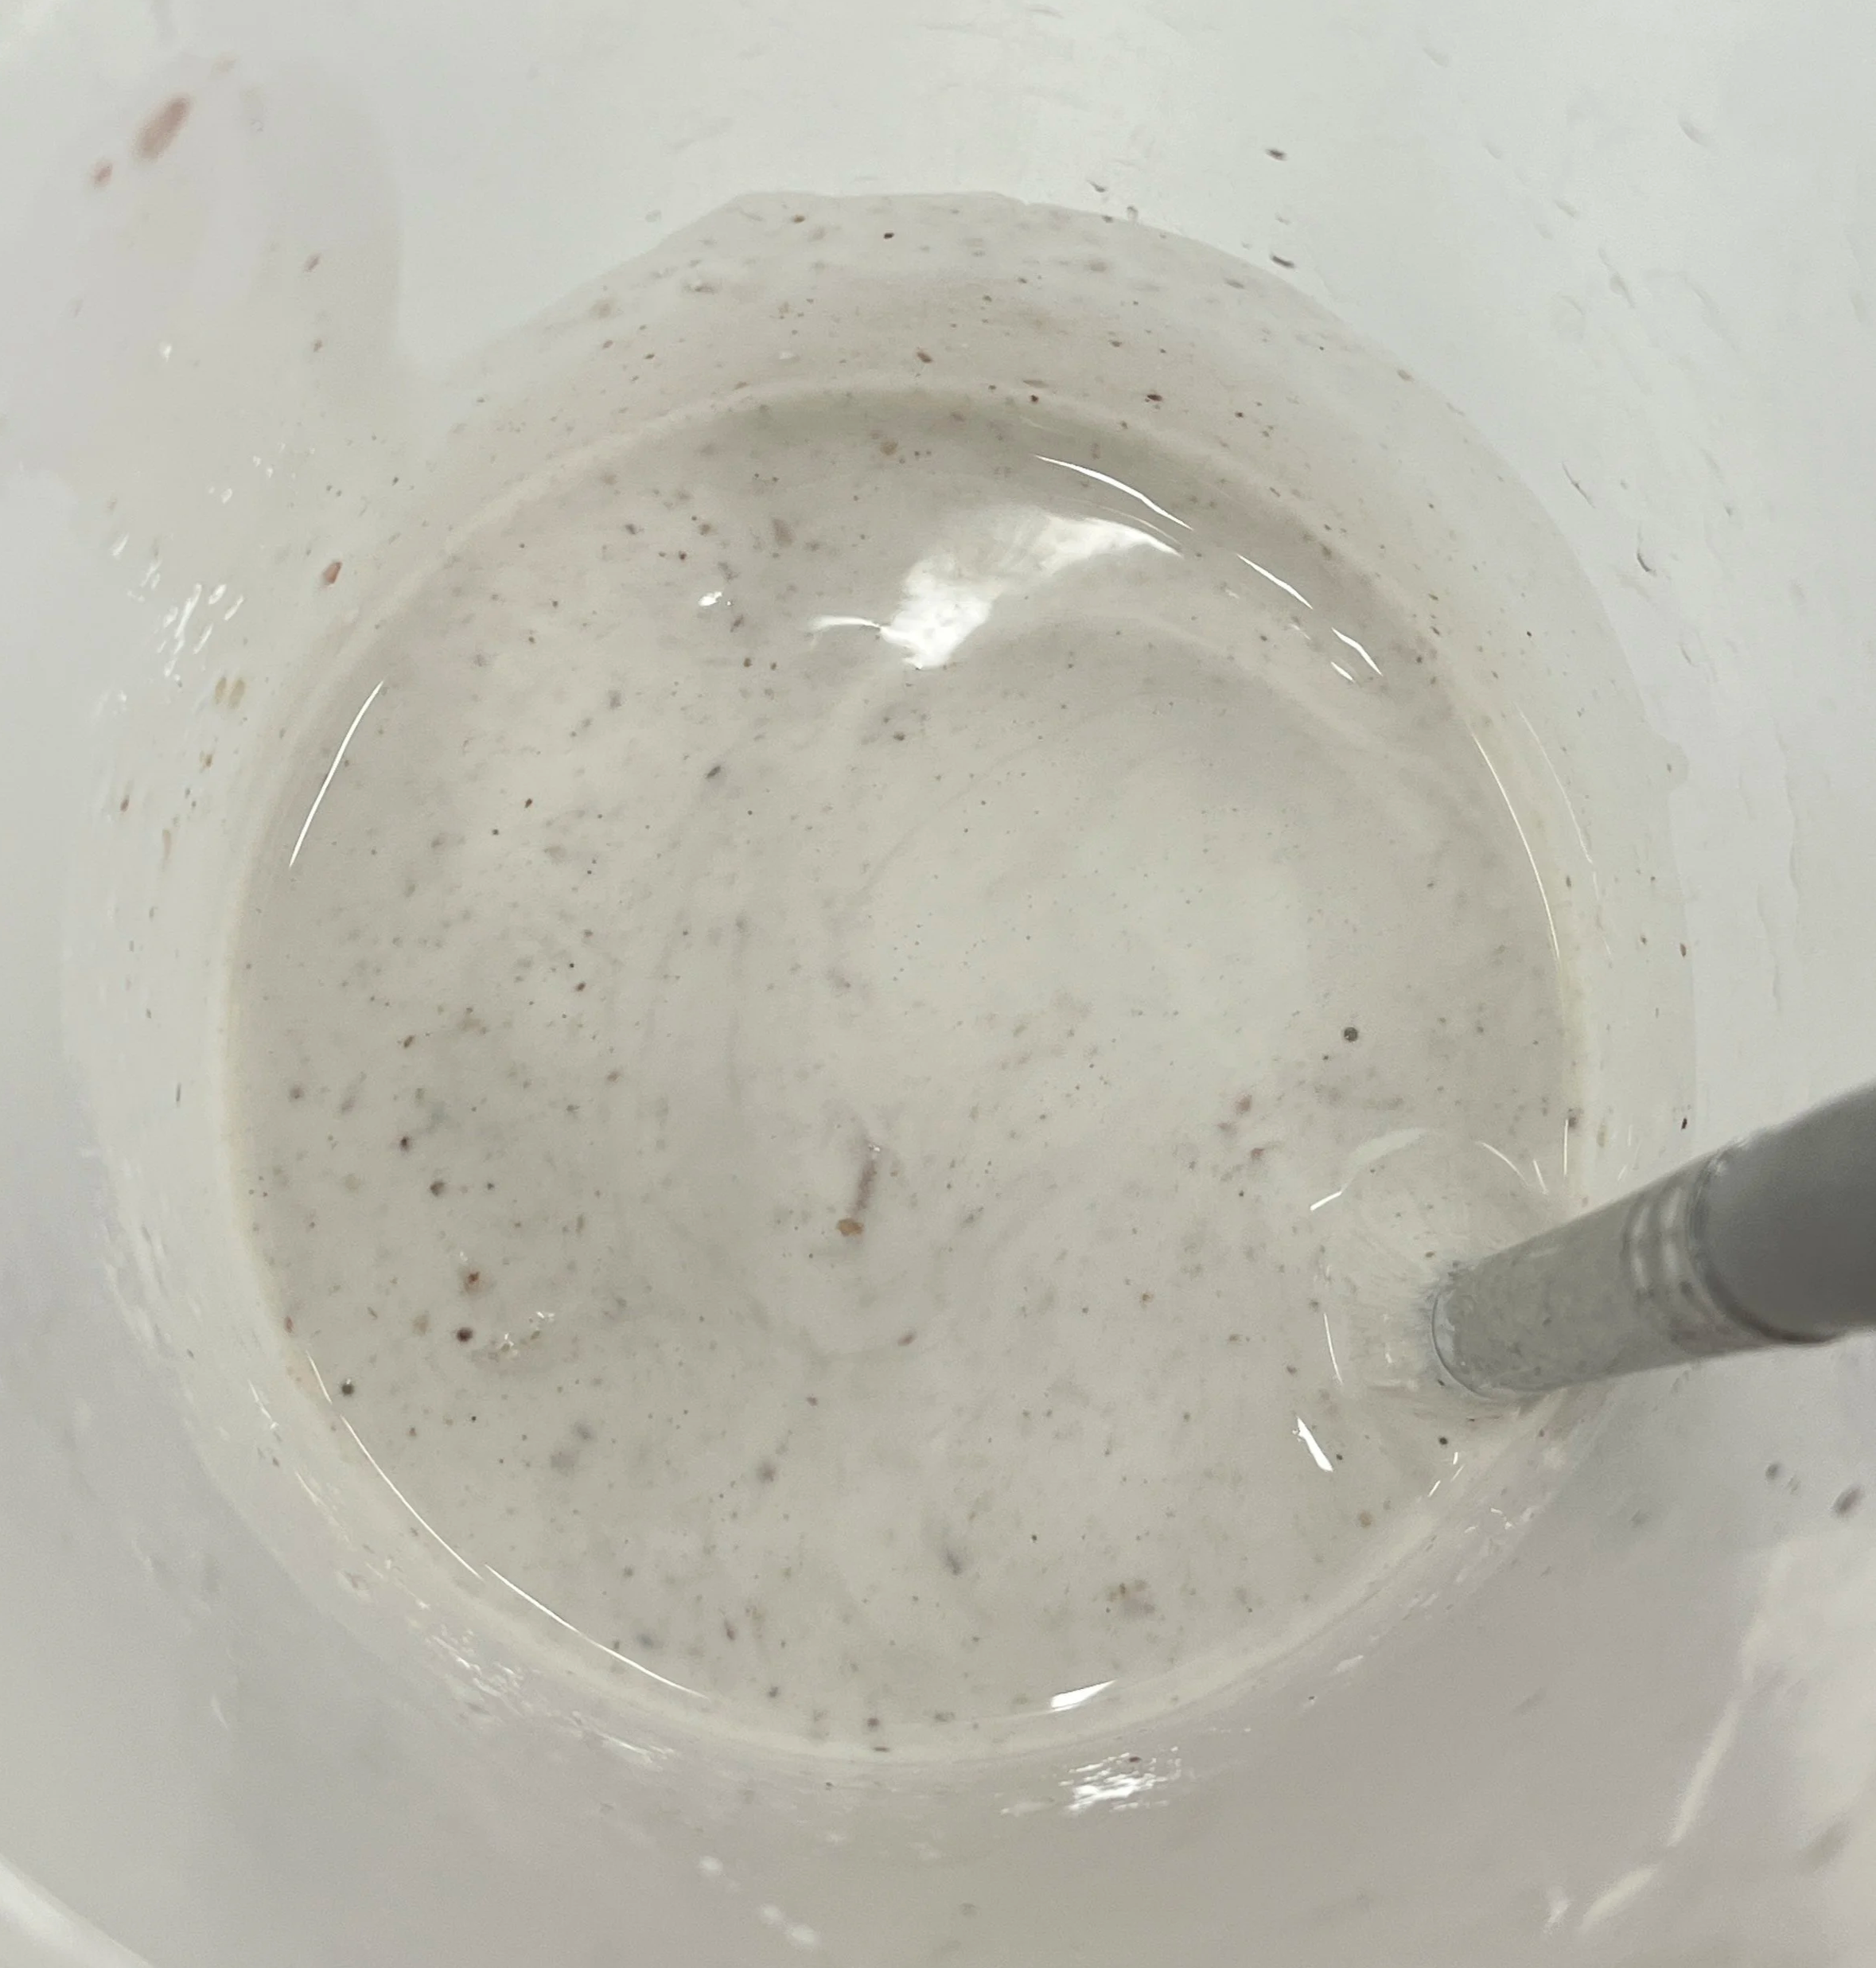
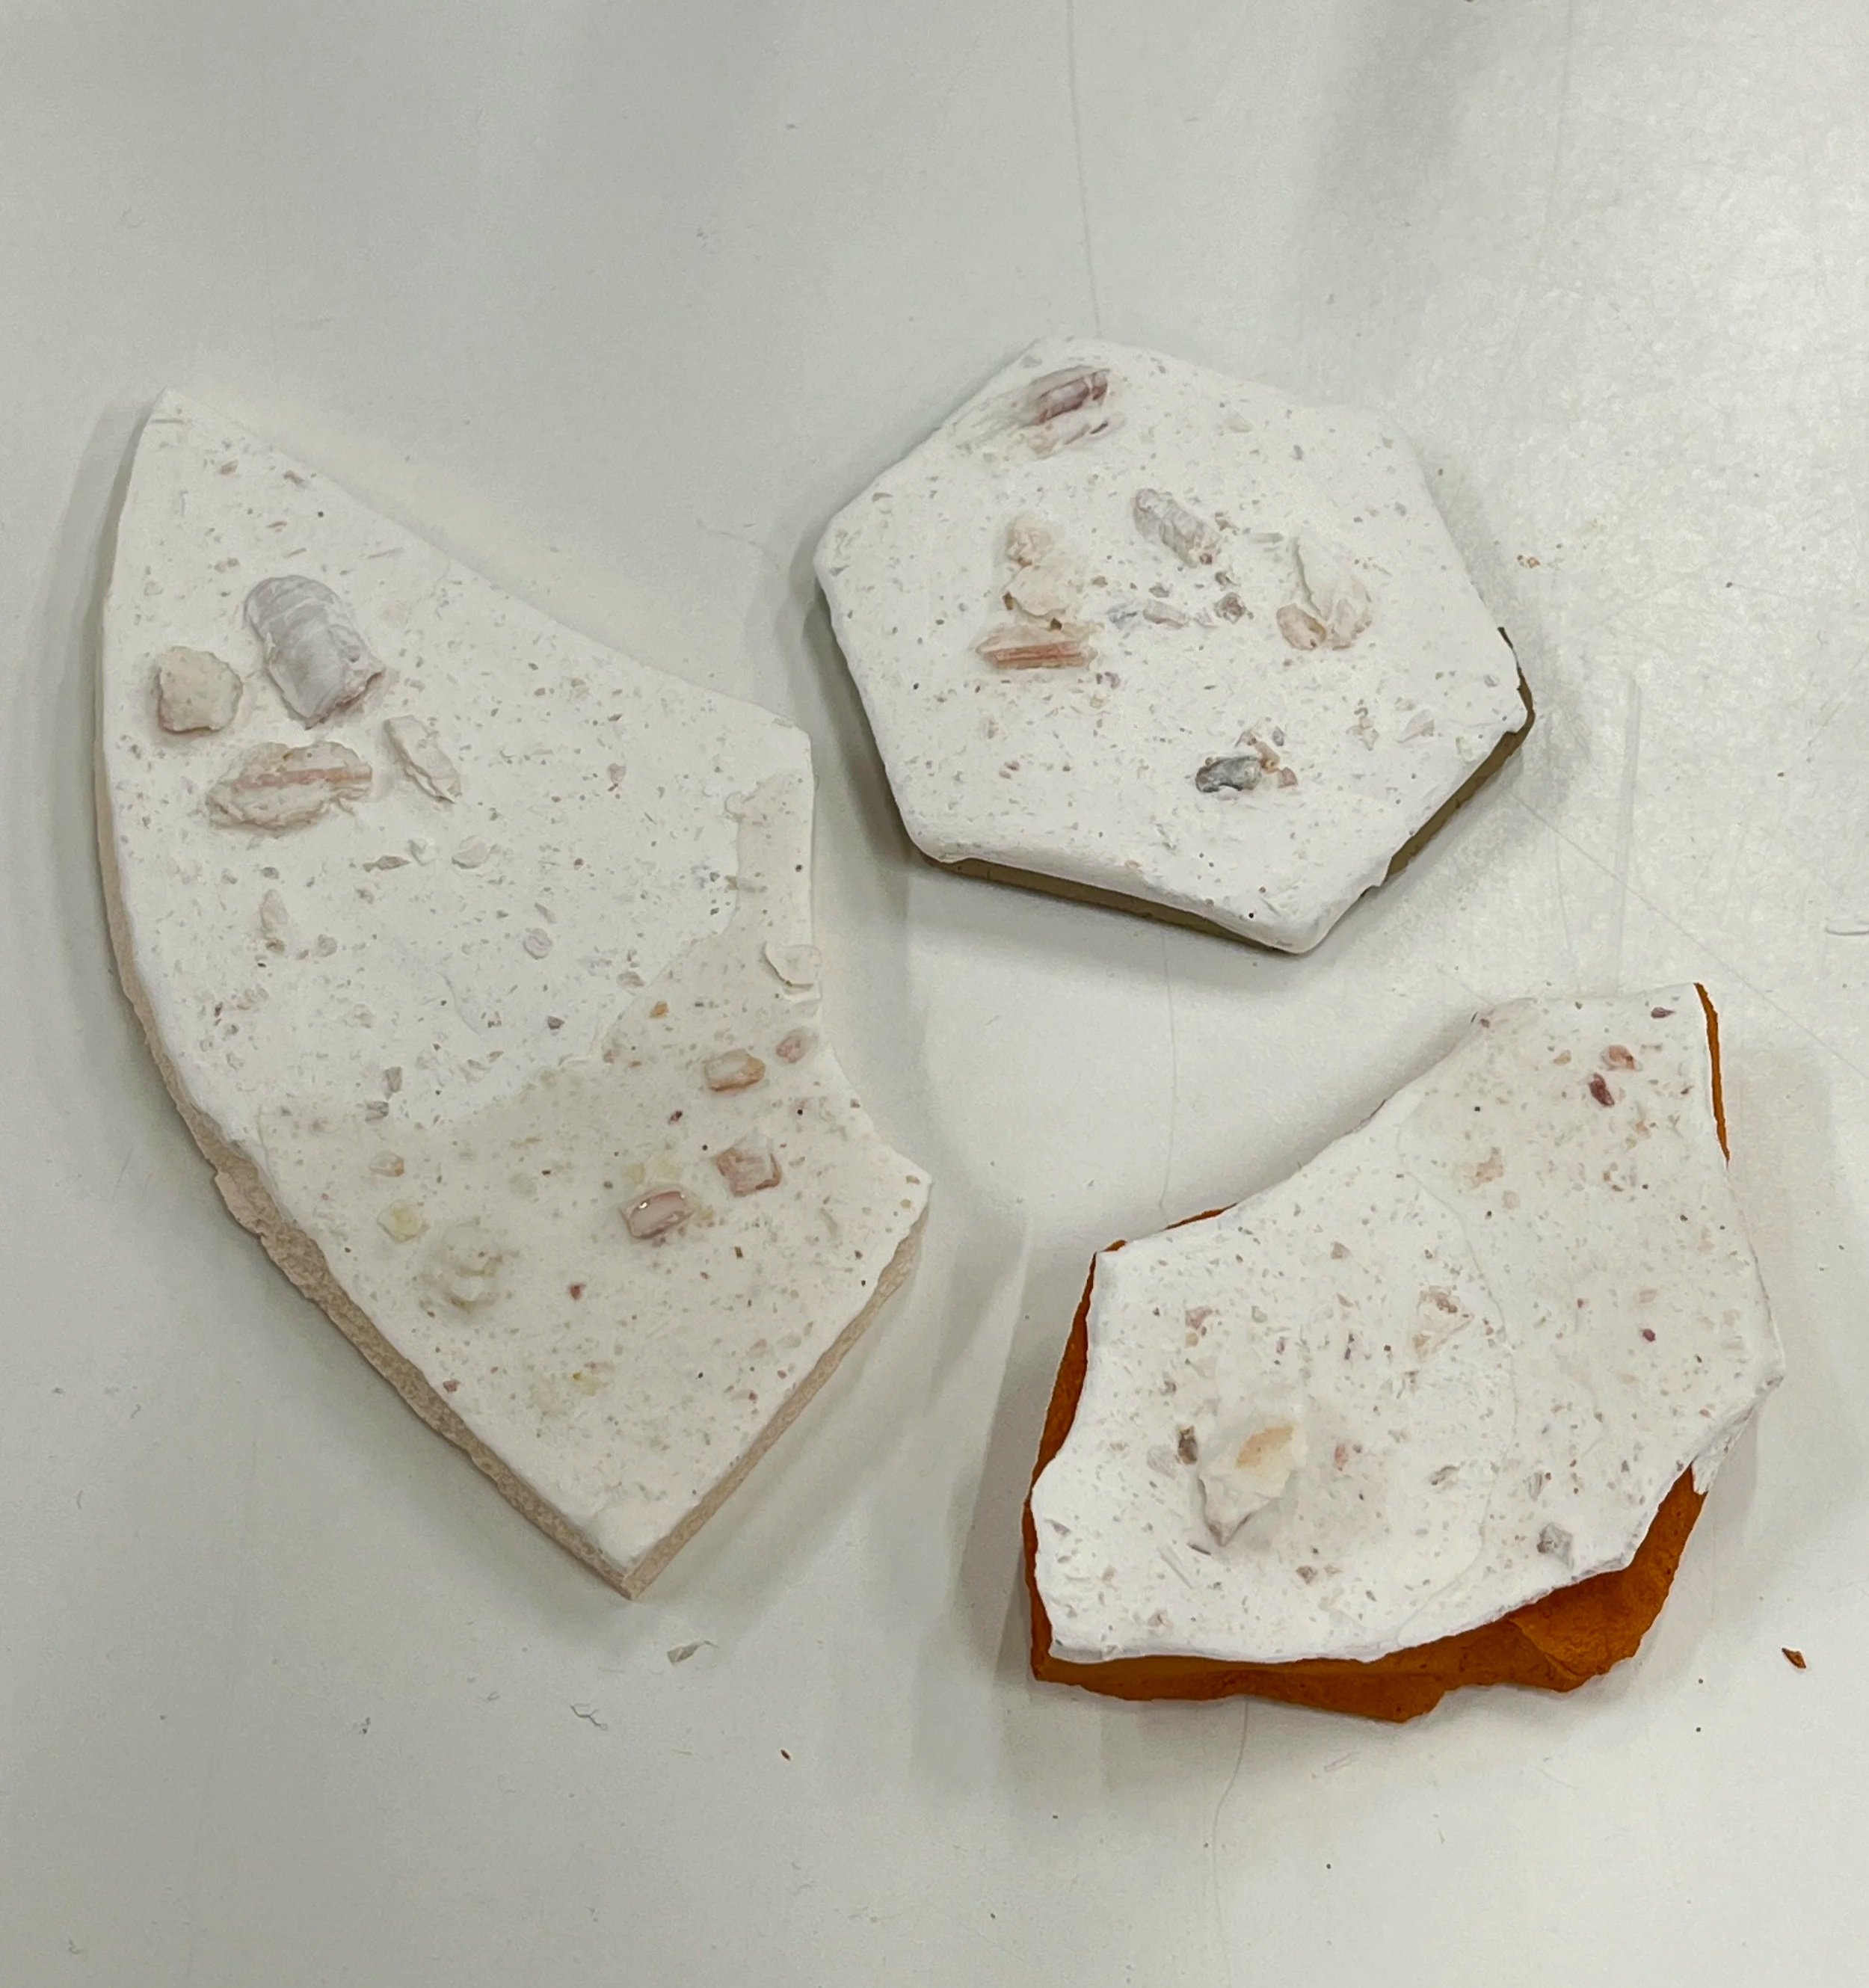
I mixed a portion of the crushed shells into a clear glaze and brushed this onto the surfaces of biscuit clay. There were three types of clay: porcelain, brown clay, and red clay. When first applied, it was nice to see specs of the shells' colour coming through, but I was informed that these colours most likely won’t survive the firing. When they came out
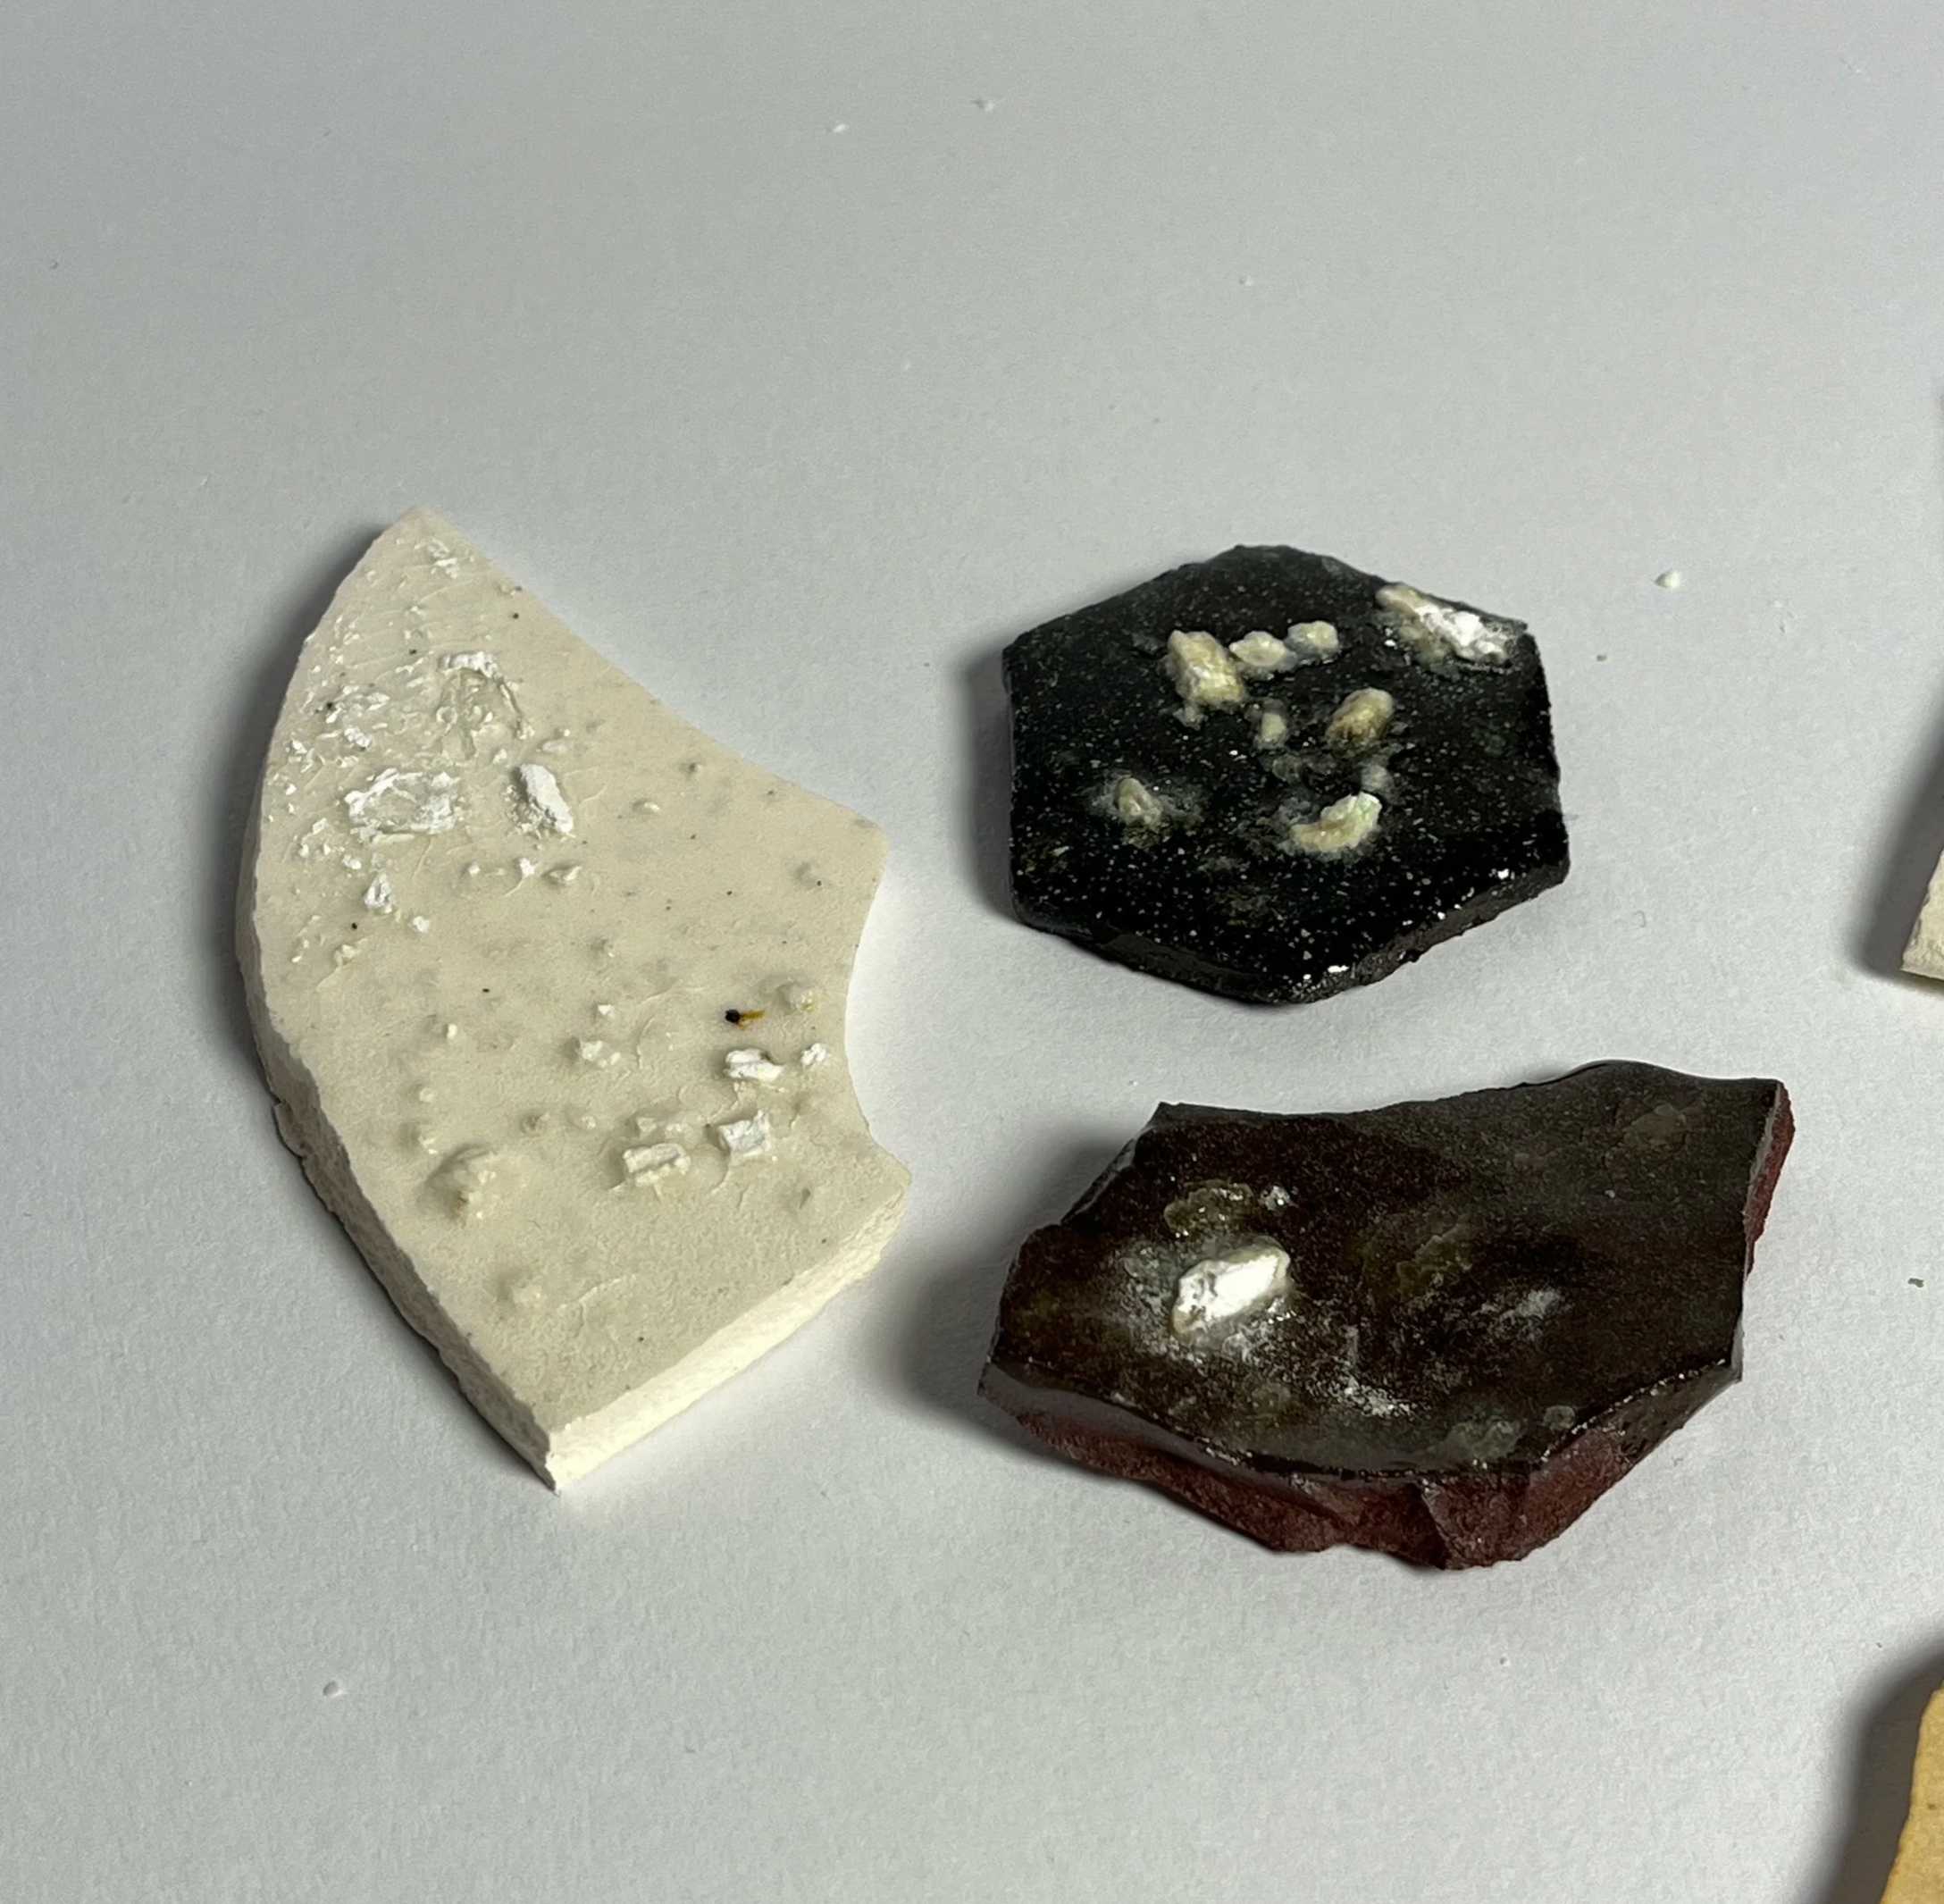
Figure 4,5,6. Shells mixed in clear glaze. Sample brushed on before firing. Samples after firing. [Photograph]. Note. Photographed by author
Figure 9.10. Shells placed on top of samples before firing. Samples after firing. [Photograph]. Note. Photographed by author
of the kiln, the larger shell pieces had turned into clumps of white powder trapped under a layer of glaze, and the finer parts appeared as tiny specs of white, adding texture to the surface, especially on the darker clay.
Sprinkling crushed shells on top of freshly applied glaze
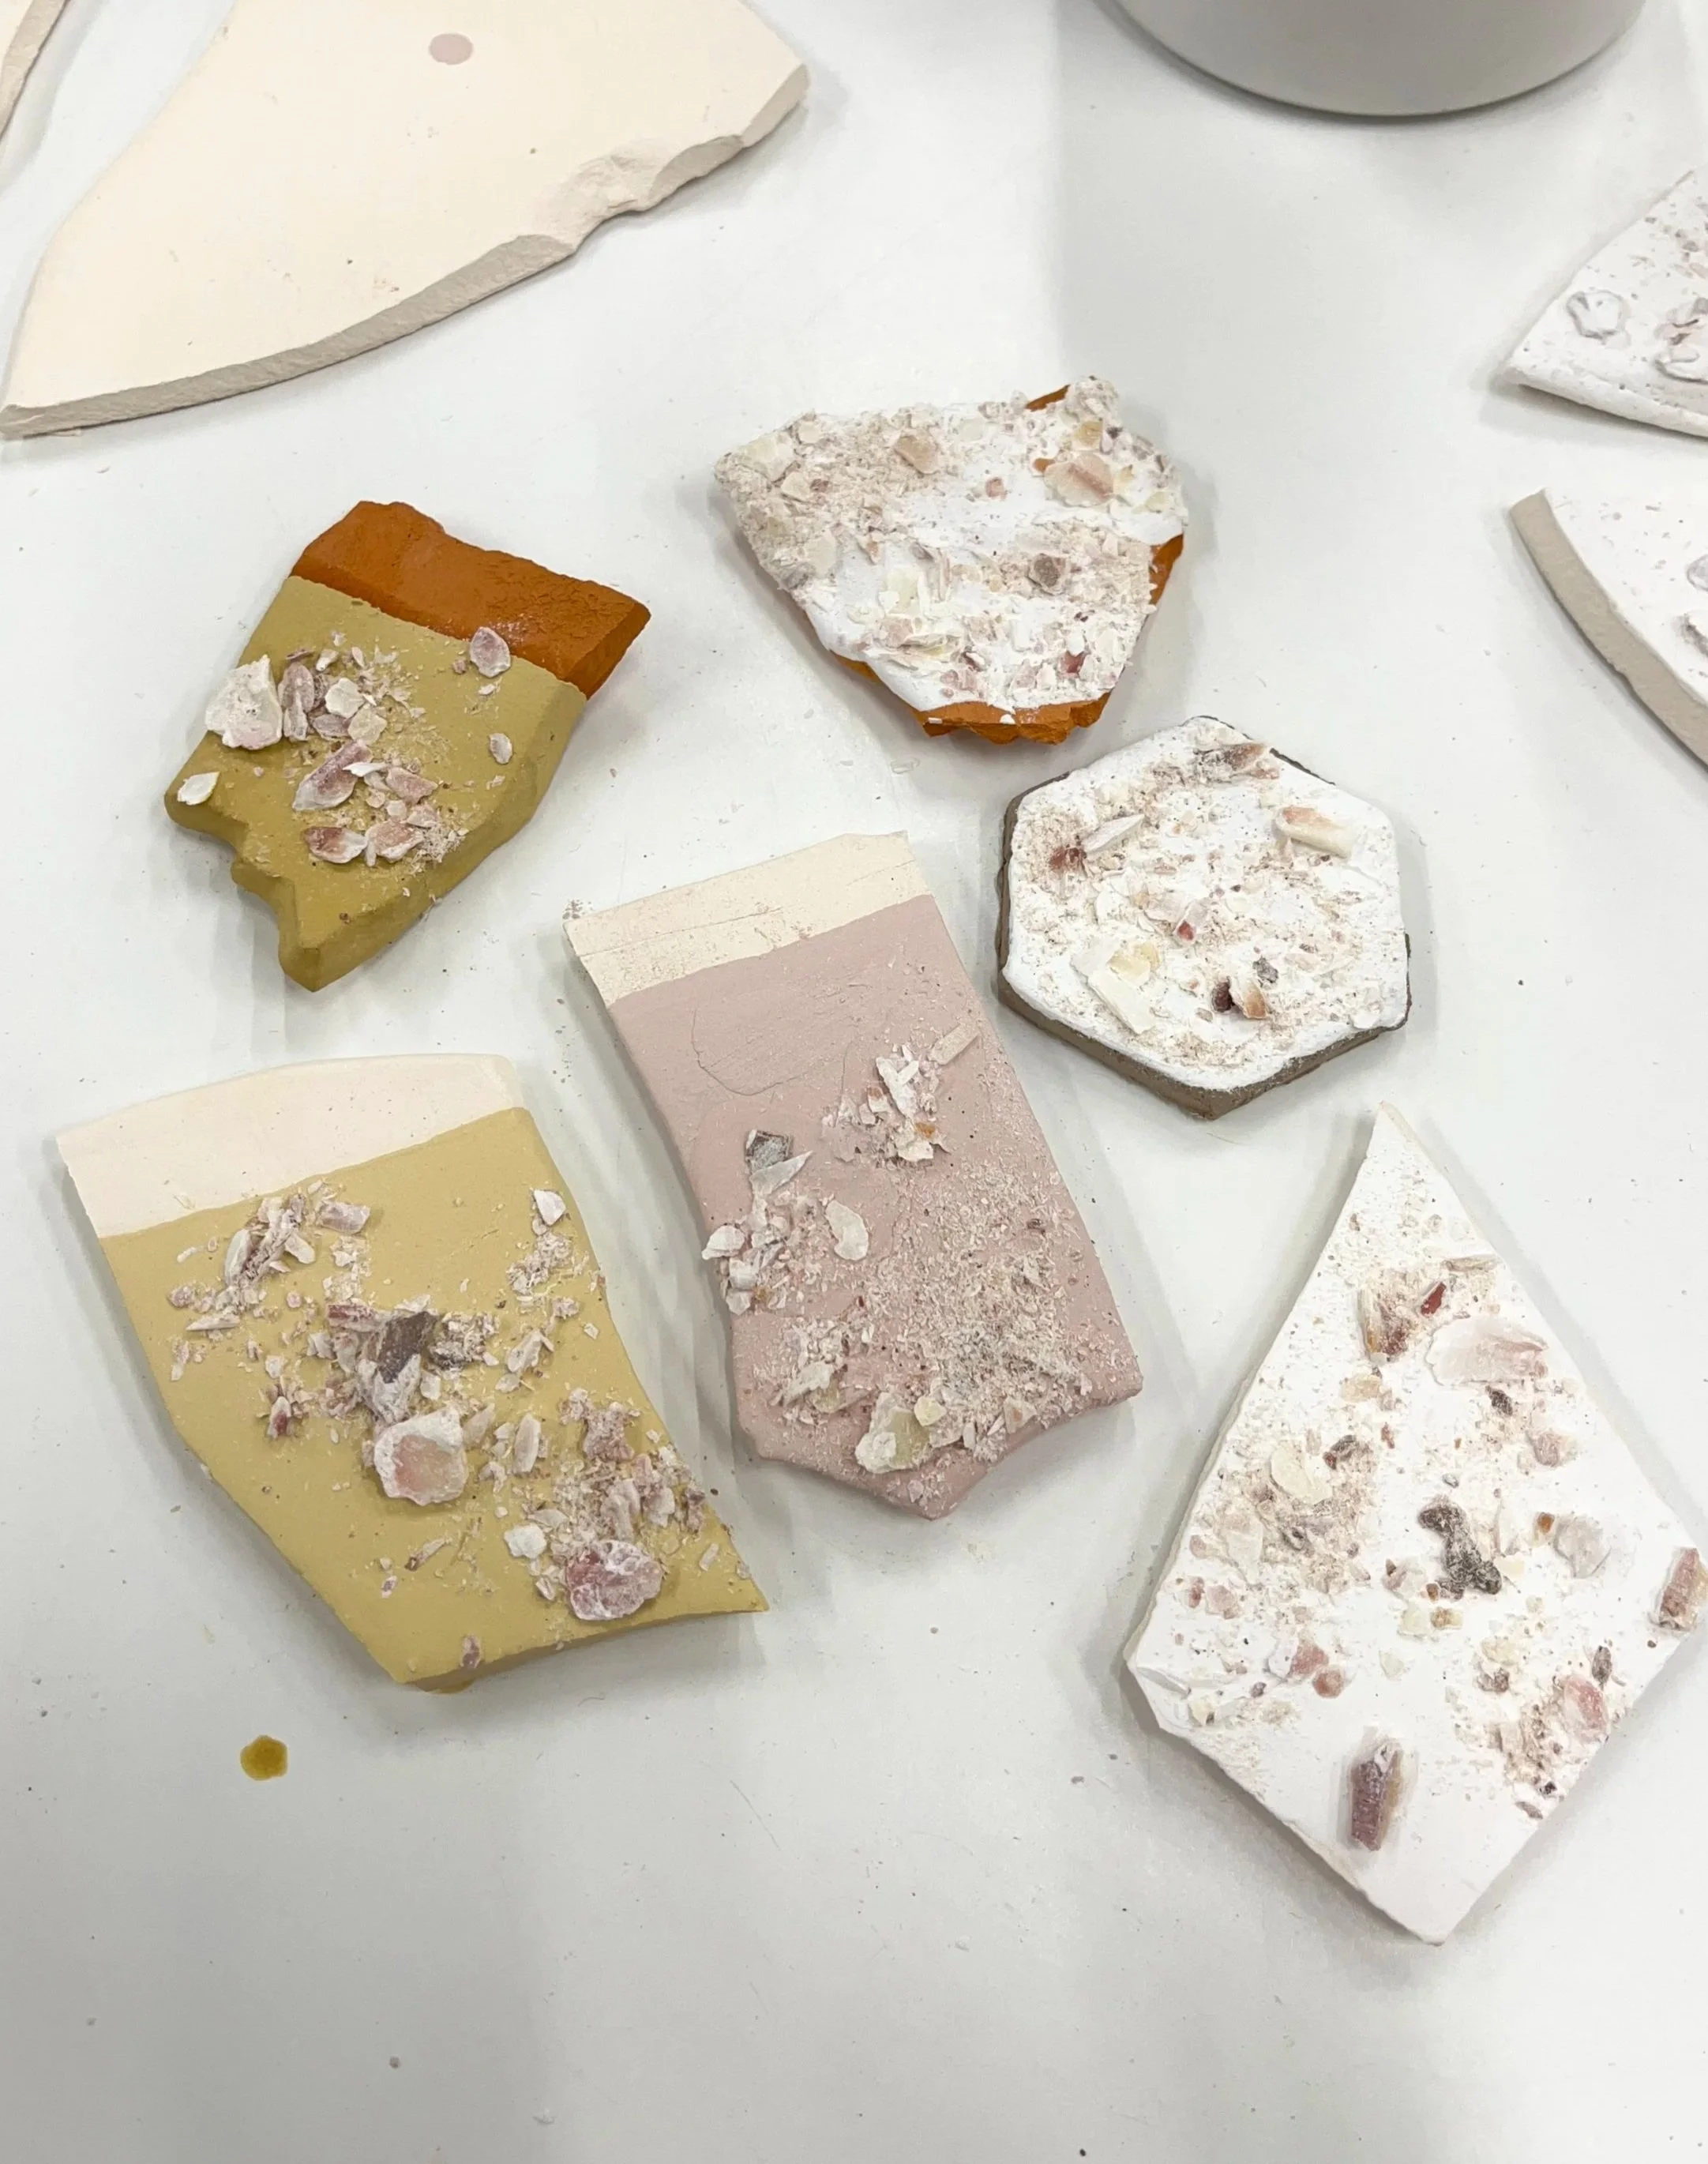
Figure 7,8. Shells sprinkled on glaze before firing. Samples after firing. [Photograph]. Note. Photographed by author
I brushed or dipped the clay piece in different glazes and sprinkled the shells on top. This was a more difficult and unpredictable process than I had initially imagined. This was because the glaze would dry before I had time to get the shells on the surface, so I kept trying, resulting in unevenly distributed shells. With the clear glaze, as with the first mixing method, it mainly showed additional texture and clumps of powder, but the colour-glazed had a much more interesting outcome.
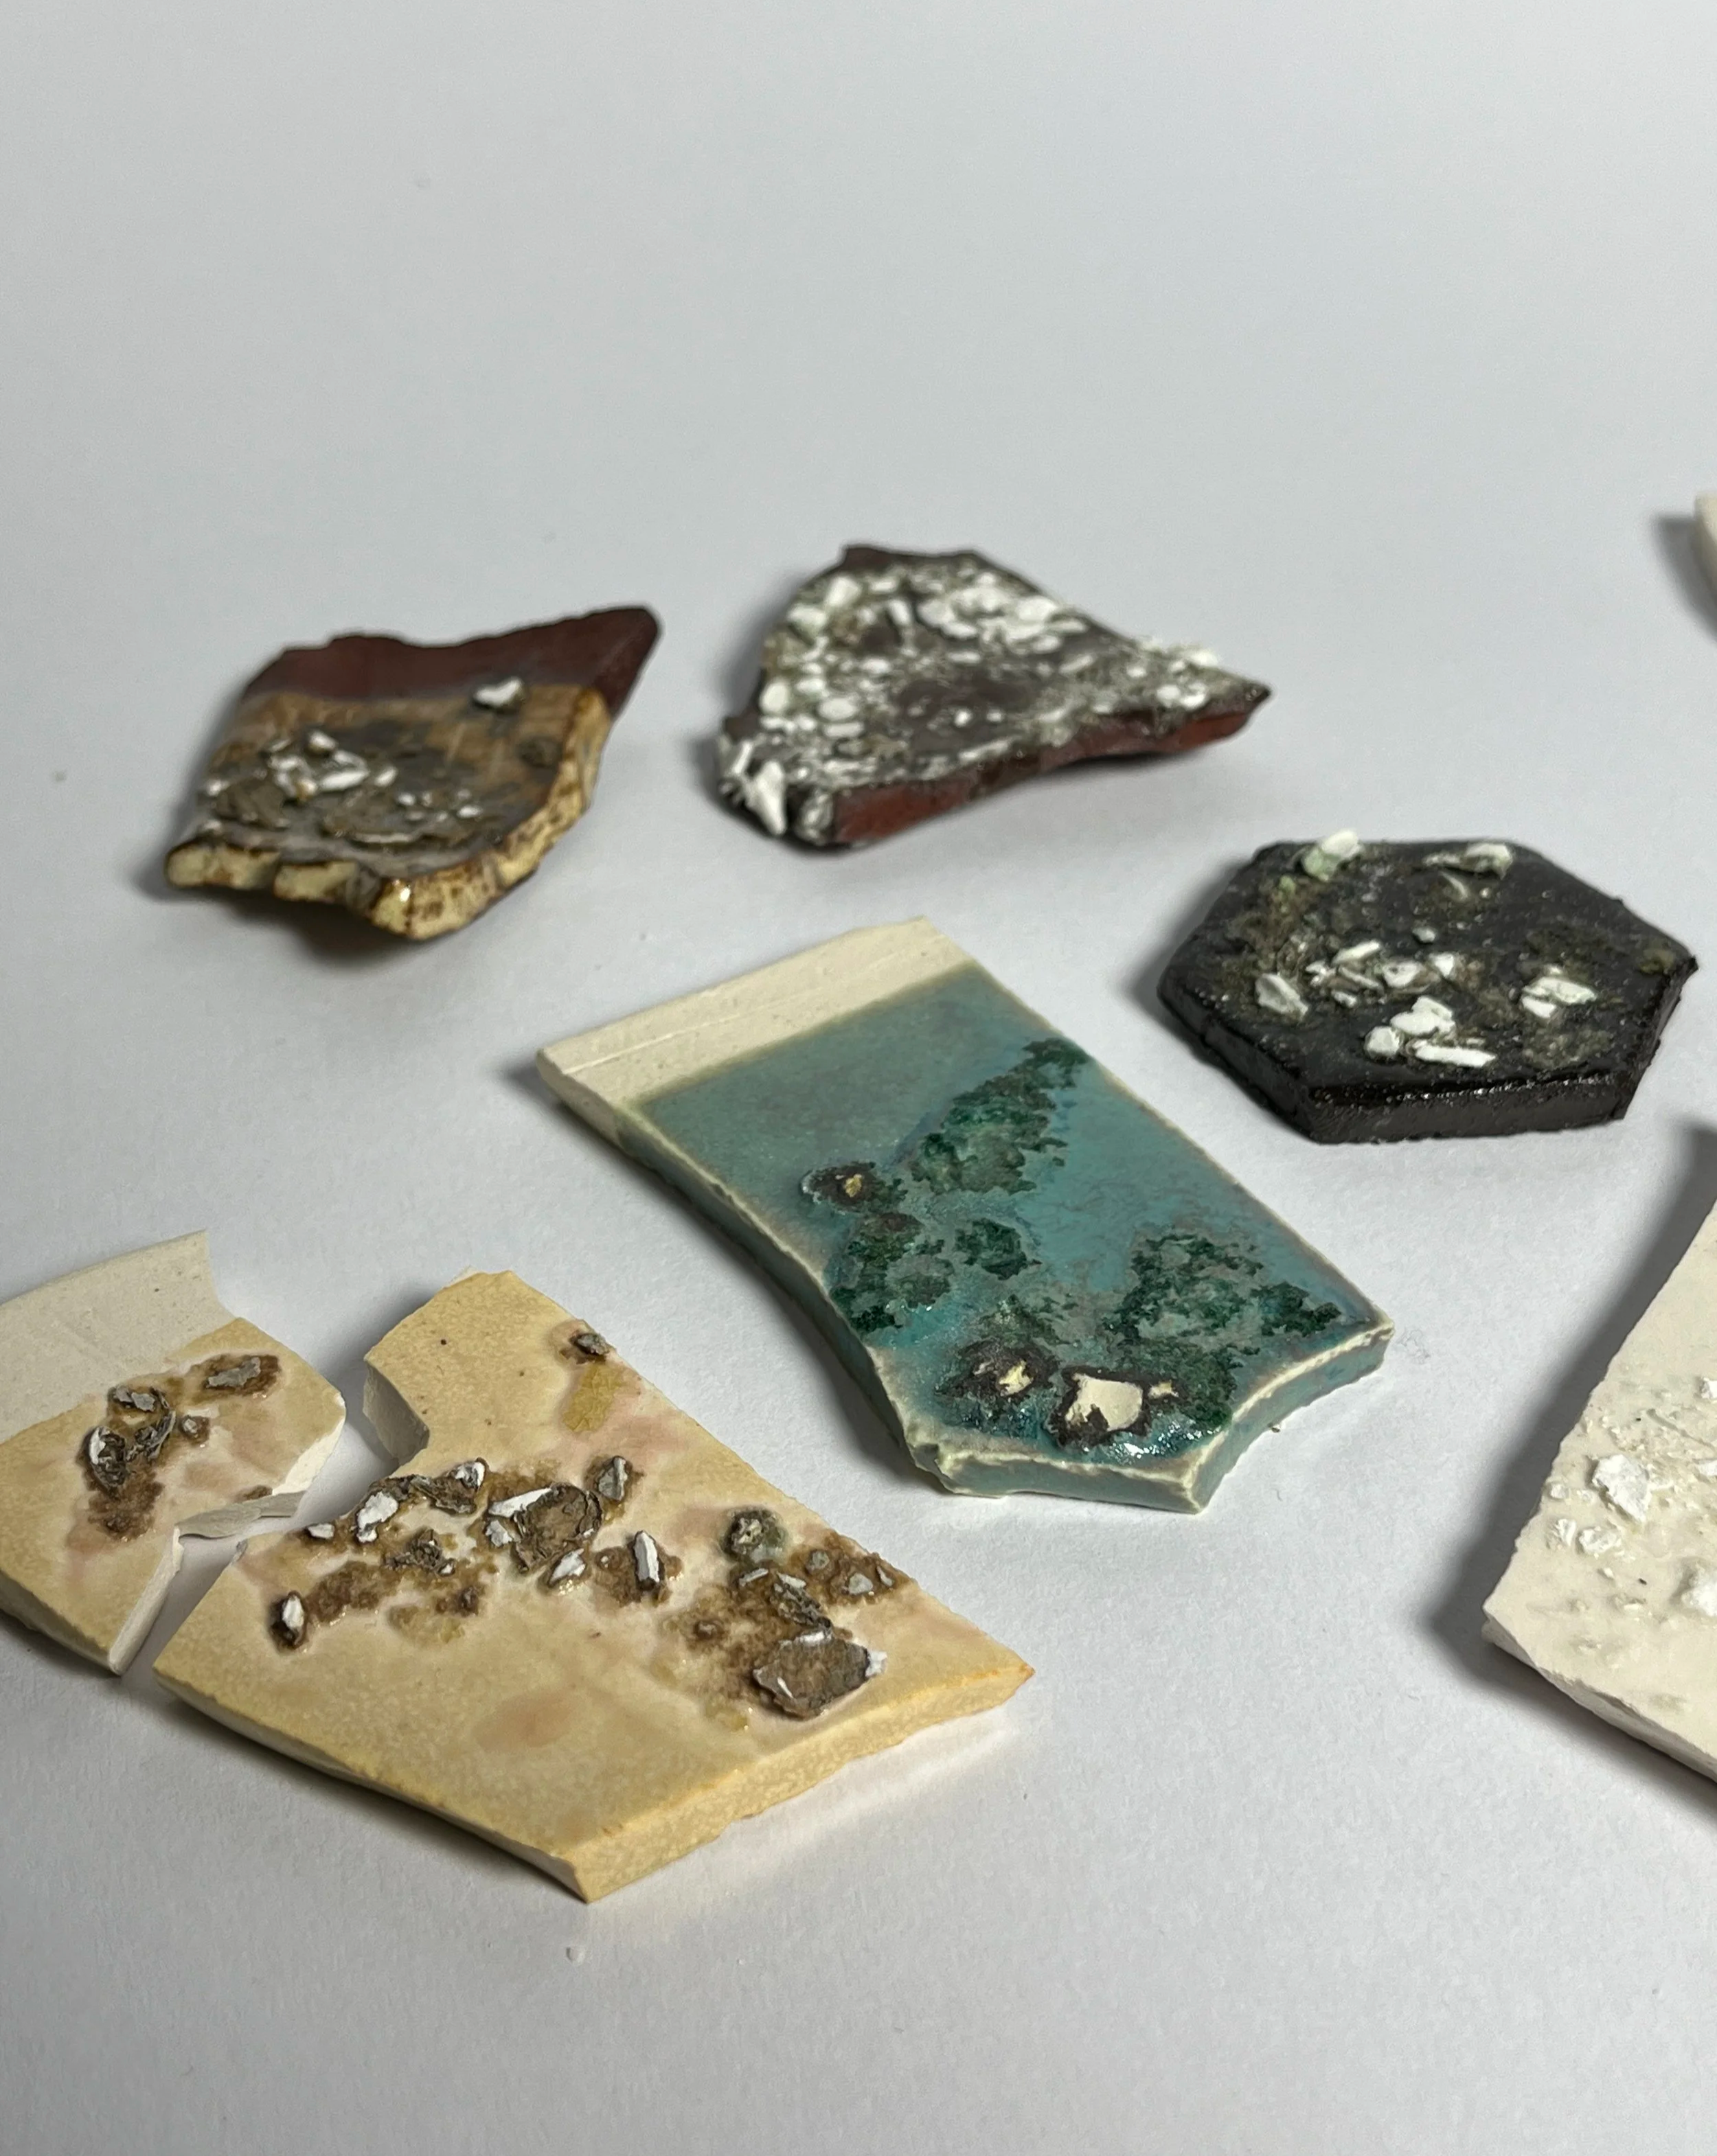
With the Jade glaze, instead of the flat colour predicted, the shells added depth and almost a translucent appearance, as the finely ground shells reacted with the glaze. The larger shells left dark grey voids where the shell disintegrated. Similarly with the hokey pokey glaze, the fine shells turned into specs of pink. After talking to the technicians, they said this reaction could be due to the shells or to the sea salt on the shells.
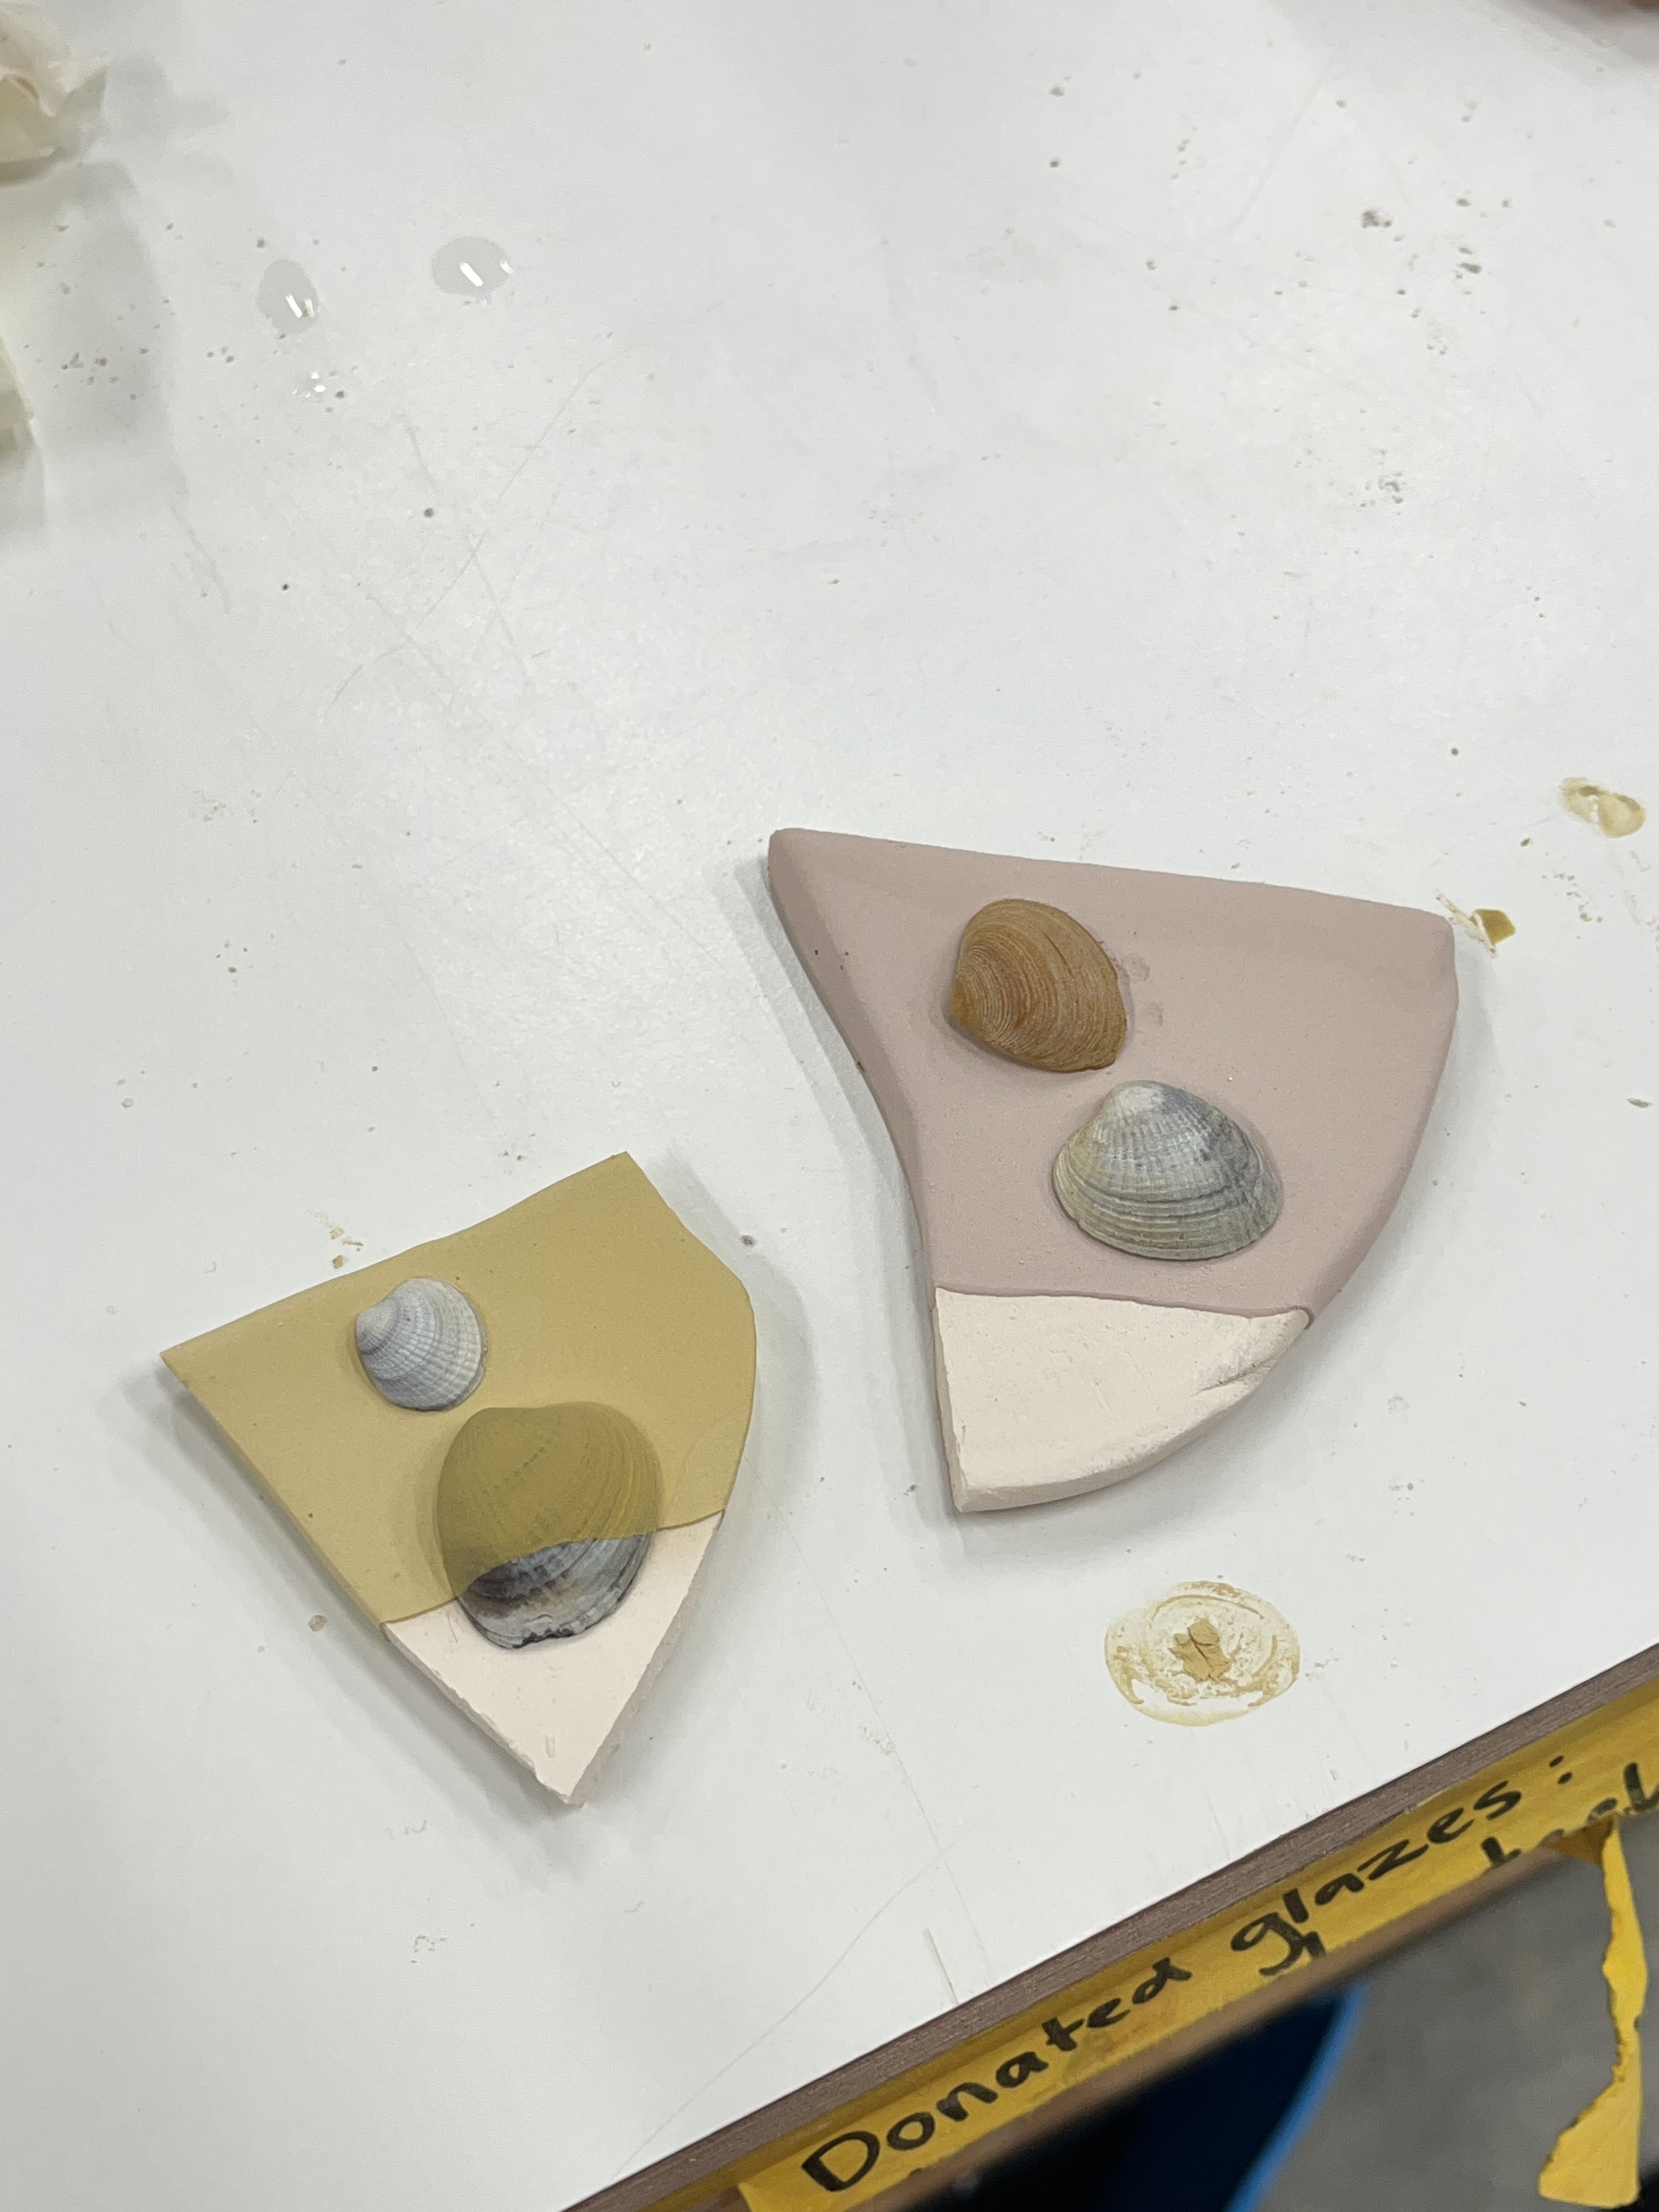
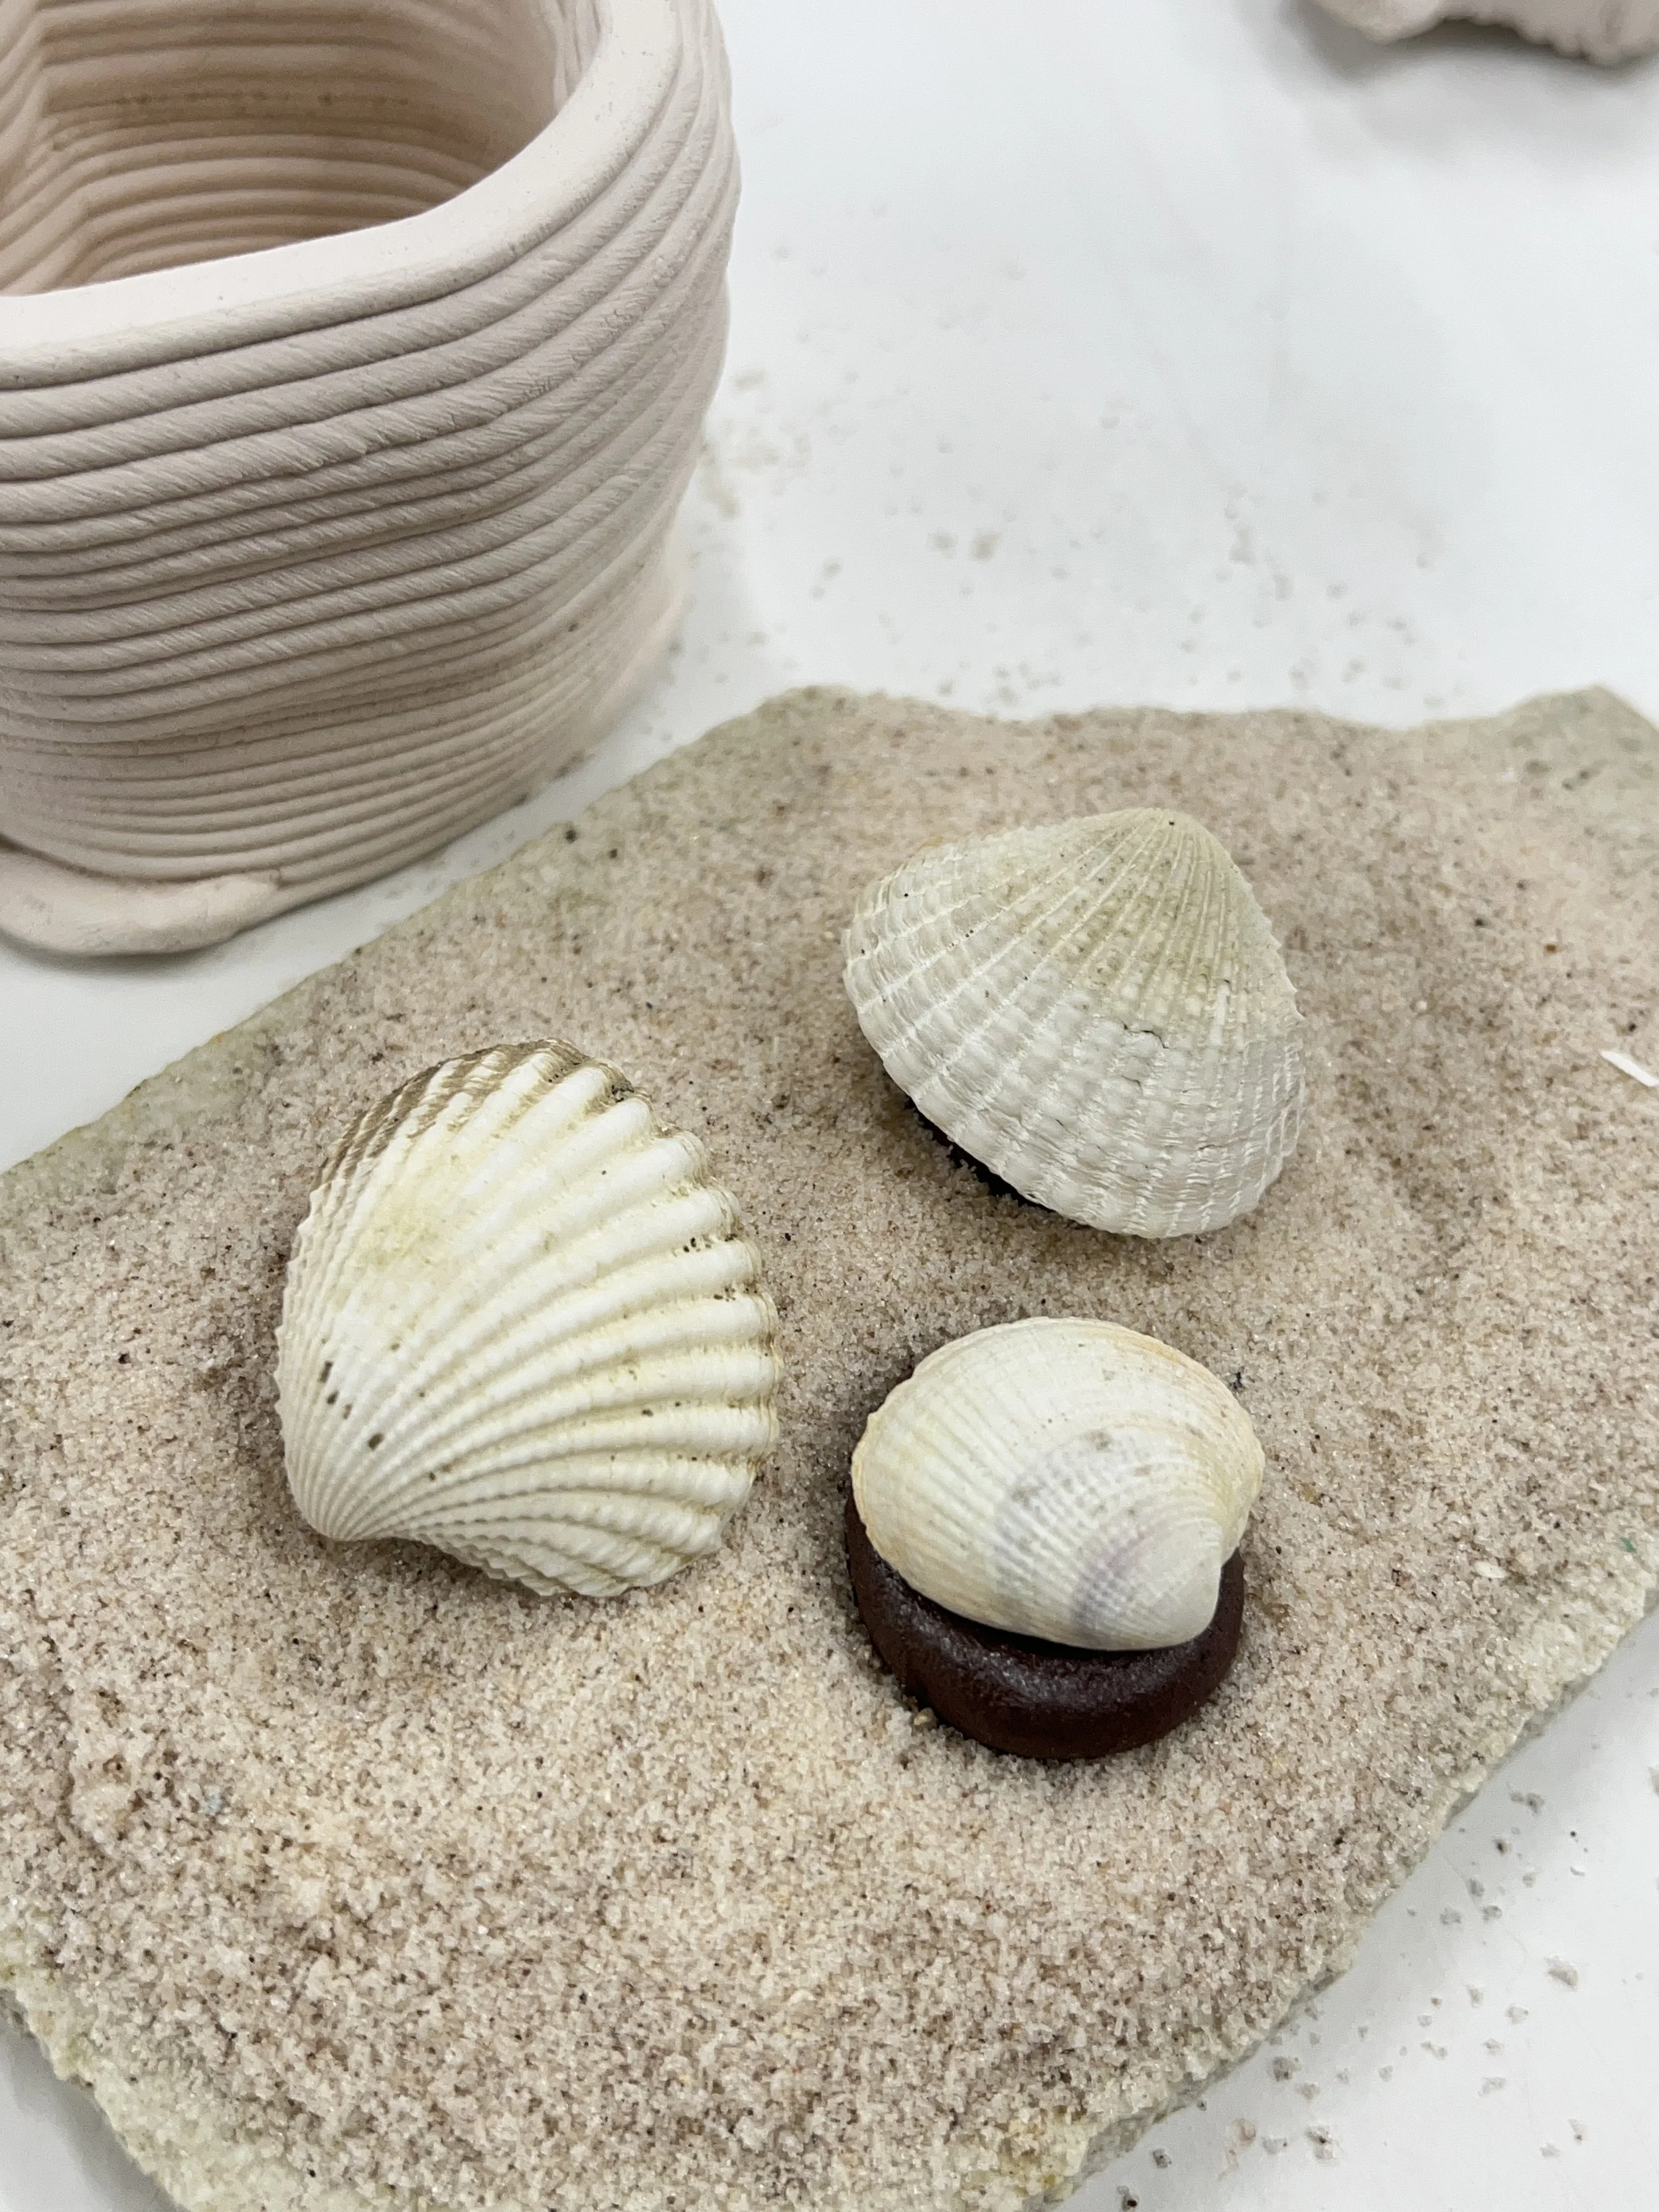
Whole shells
With smaller leftover shells, I placed them whole, without crushing, on top of glazed clay pieces. I thought this way would better show me how the shells were reacting in the kiln. I dipped one shell together with the glaze to see if it could be coated and protected. As seen with the other experiments, the shells burned off or crumbled with a light touch. But with the bigger shells, I was able to see that the parts that had contact with the glaze, the bottom of the shells, stayed in contact with the piece and left dark grey marks.
Shells as pottery stilts
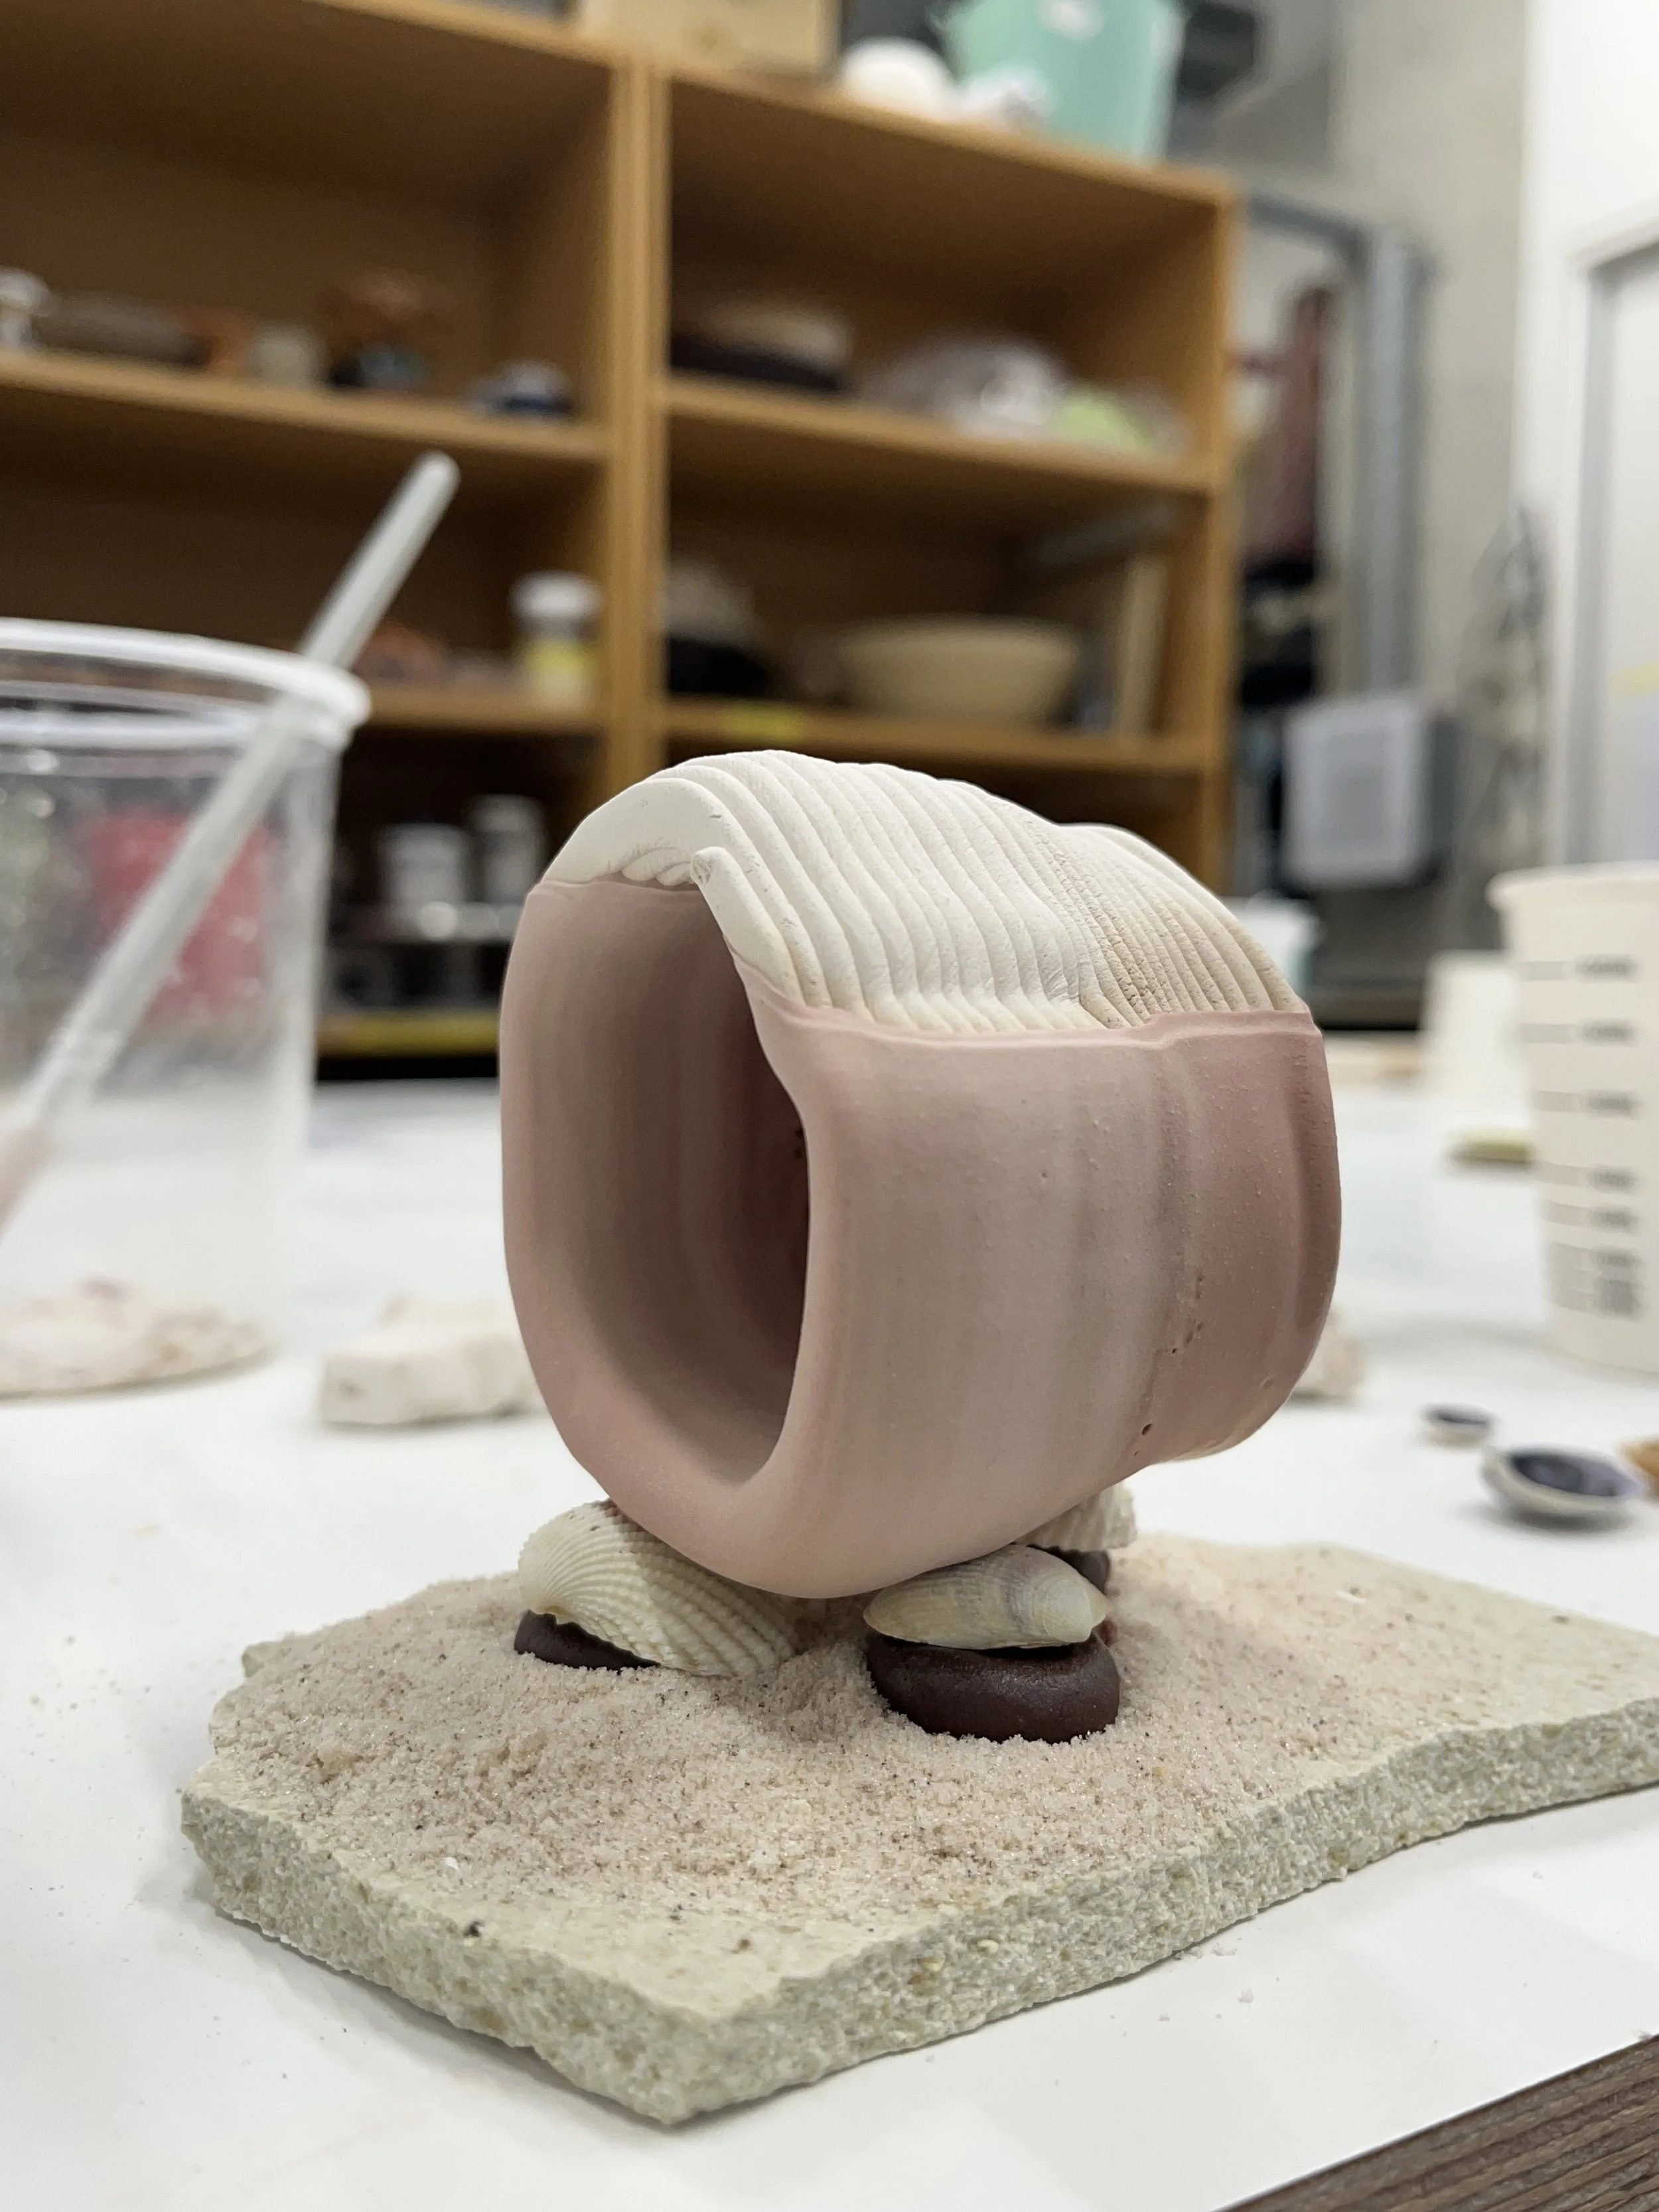
Through further research, we found that shells were historically used as stilts for pottery to prevent them from sticking to the shelves, as the shells would turn to powder (Hall-Hough, n.d.). The wet labs had a ceramic-printed sample left over, which allowed me to test this method. I tried dipping the sample for longer than usual to get a thicker glaze and emphasise the effect it has on the shells. The glaze
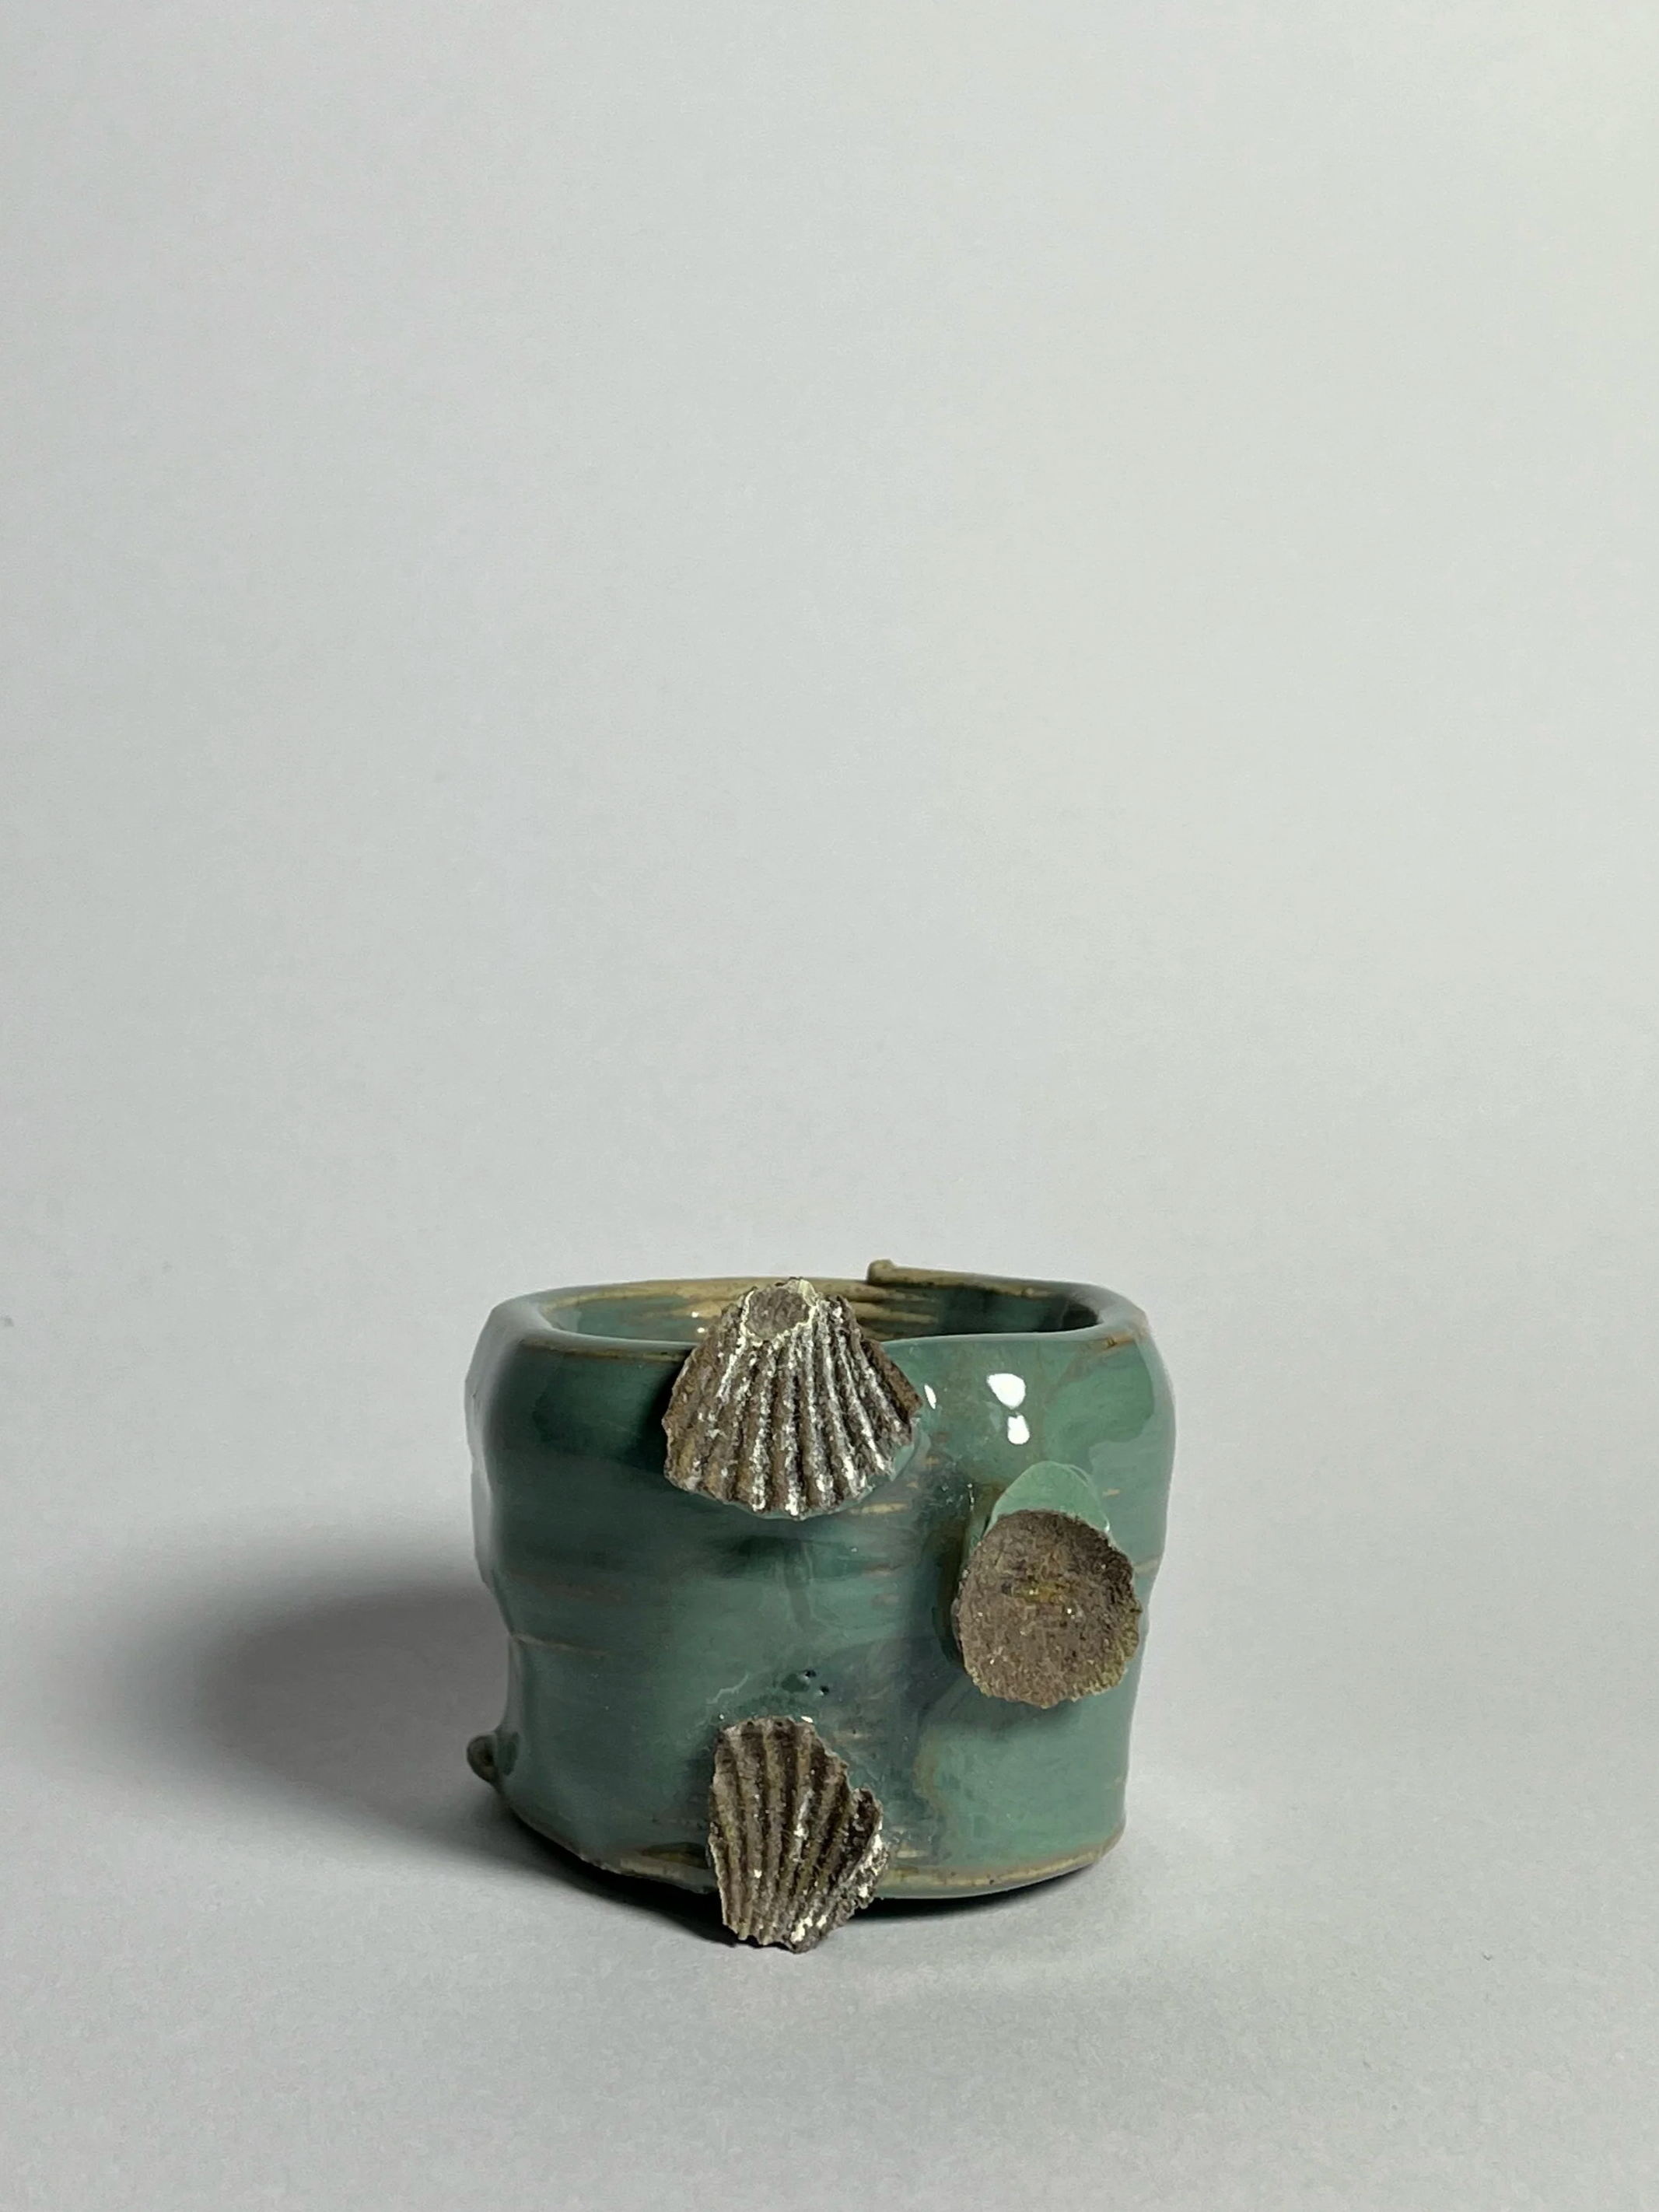
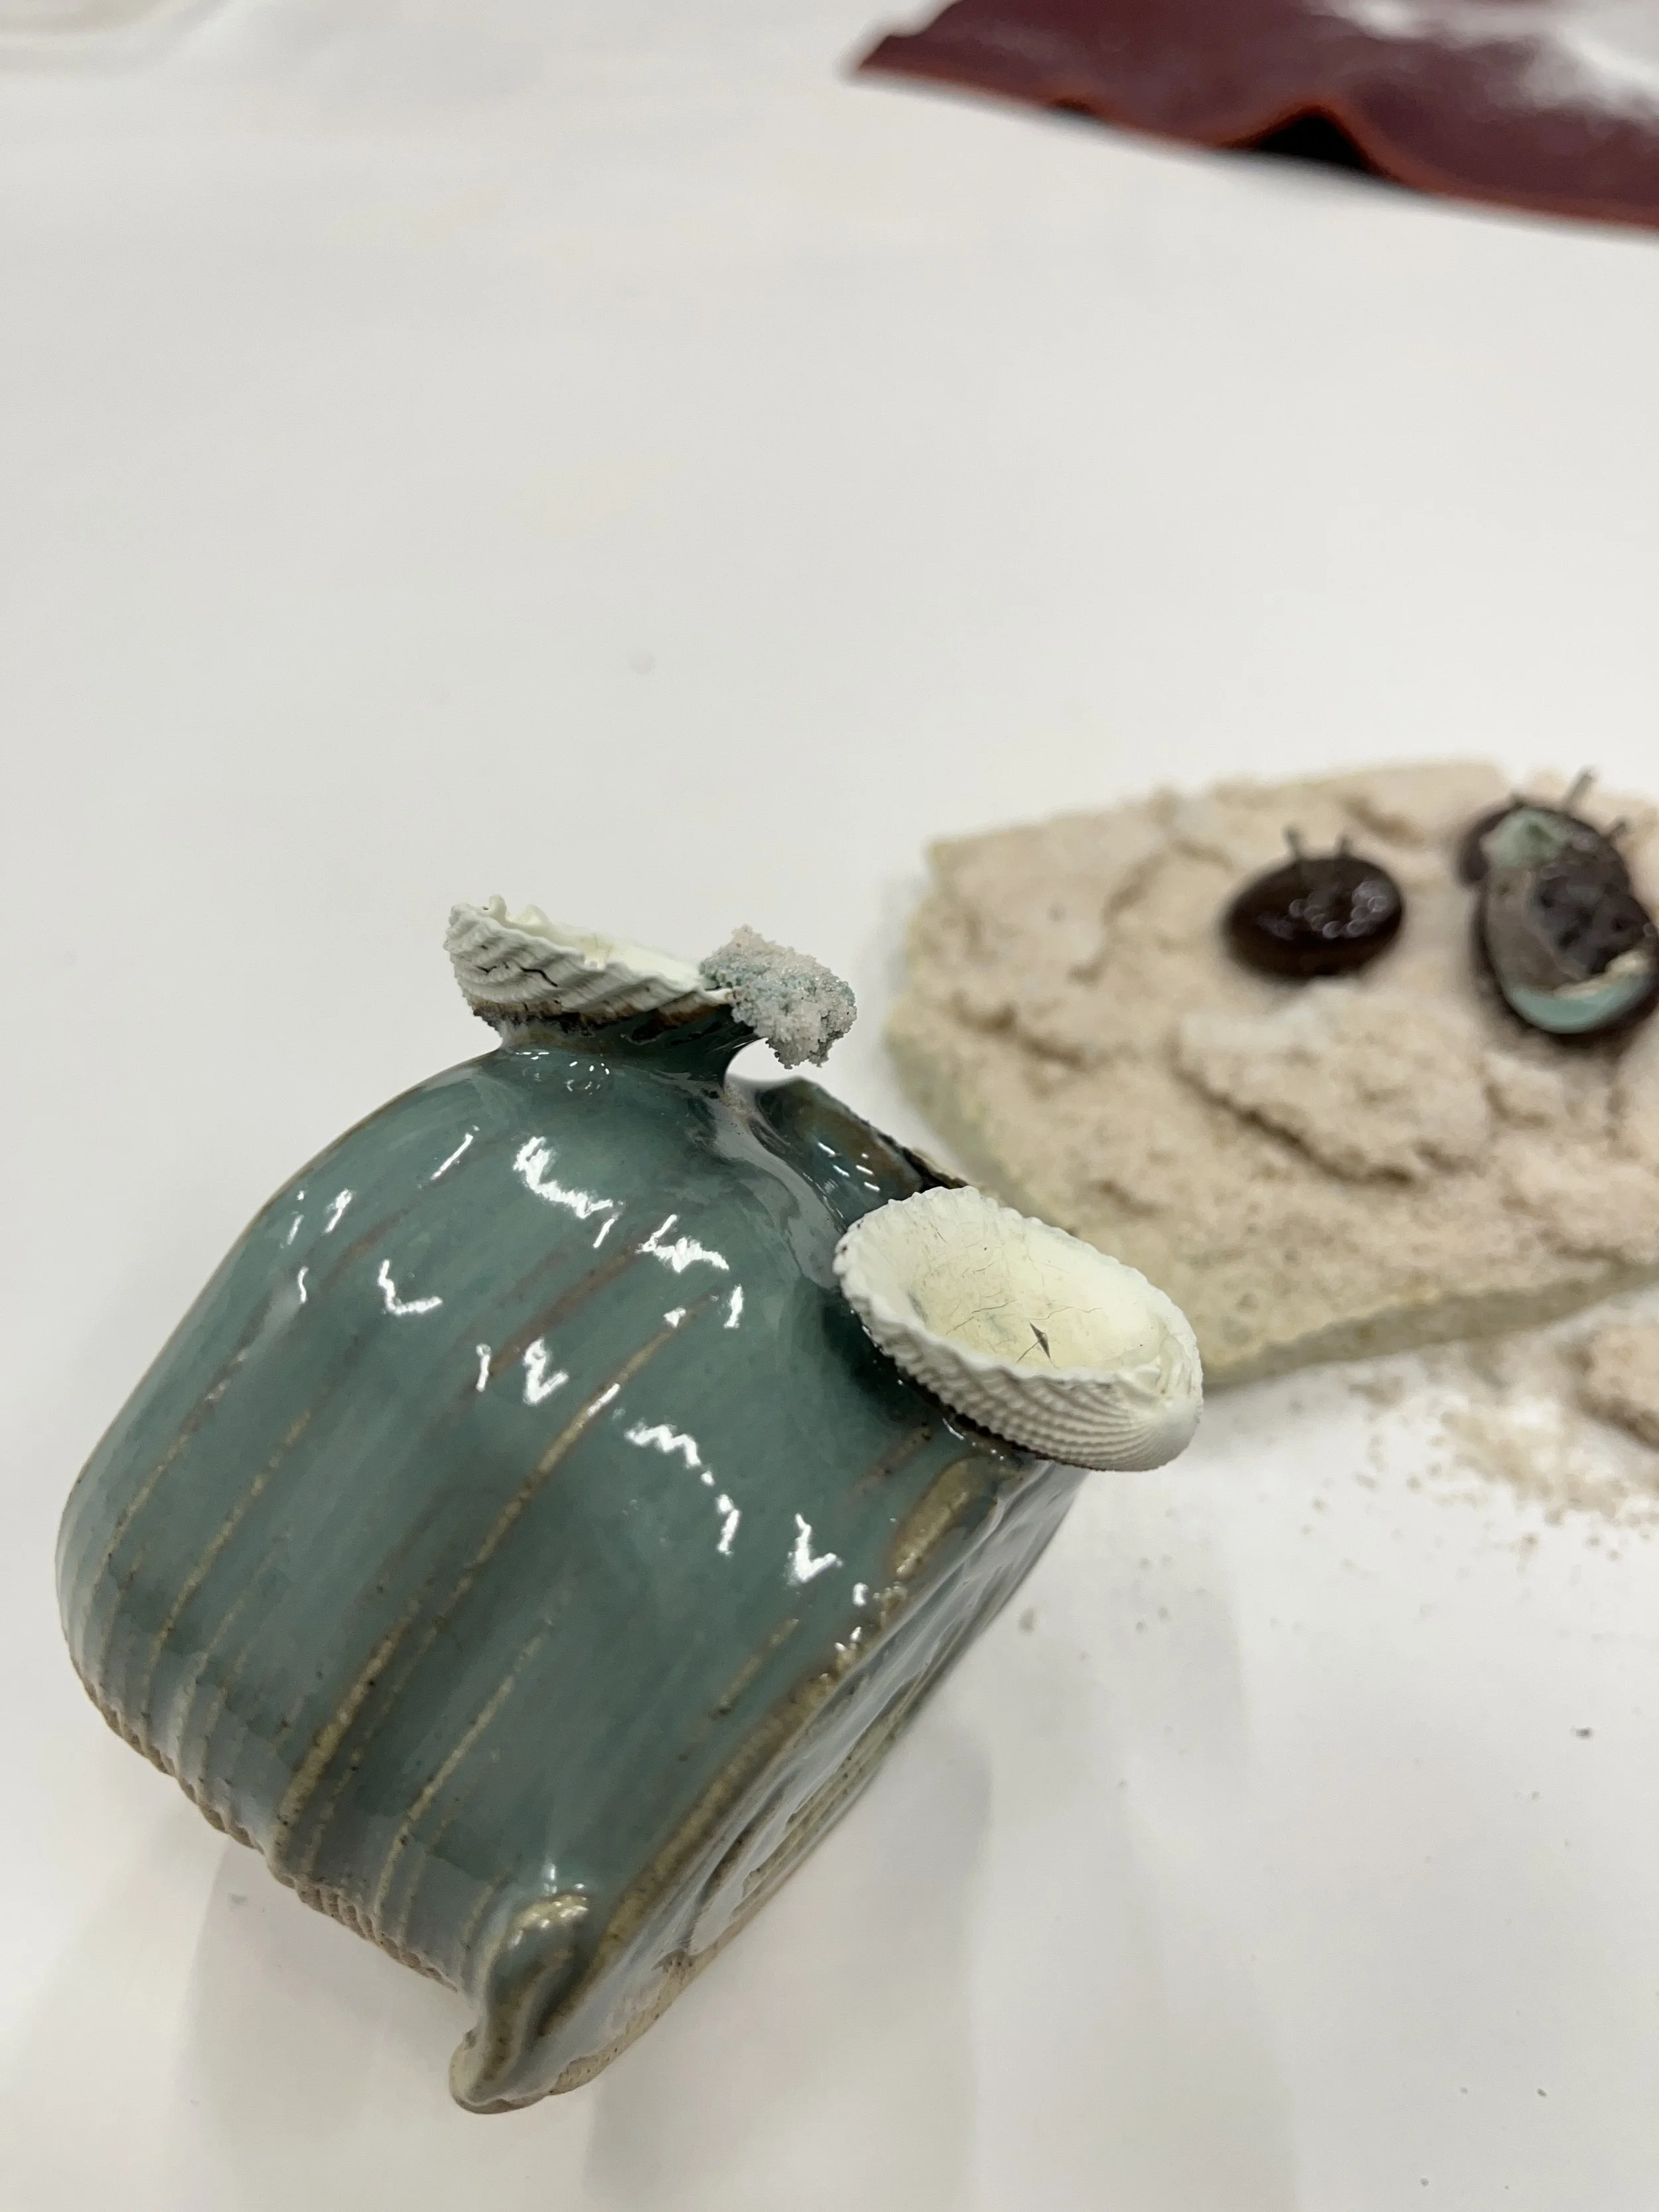
Figure 11,12,13. Shells used as stilts. Over dipped sample placed on shells. Samples after firing with shells still attatched. [Photograph]. Note. Photographed by author
dripped over and onto the shells beautifully. When the shells were broken off, they left a detailed imprint of their texture in a deep grey colour, but none of the shells remained on the surface. This is exactly what the research had said, so if my glaze was not as thick, I could see it leaving minimal marks and being successful as stilts.
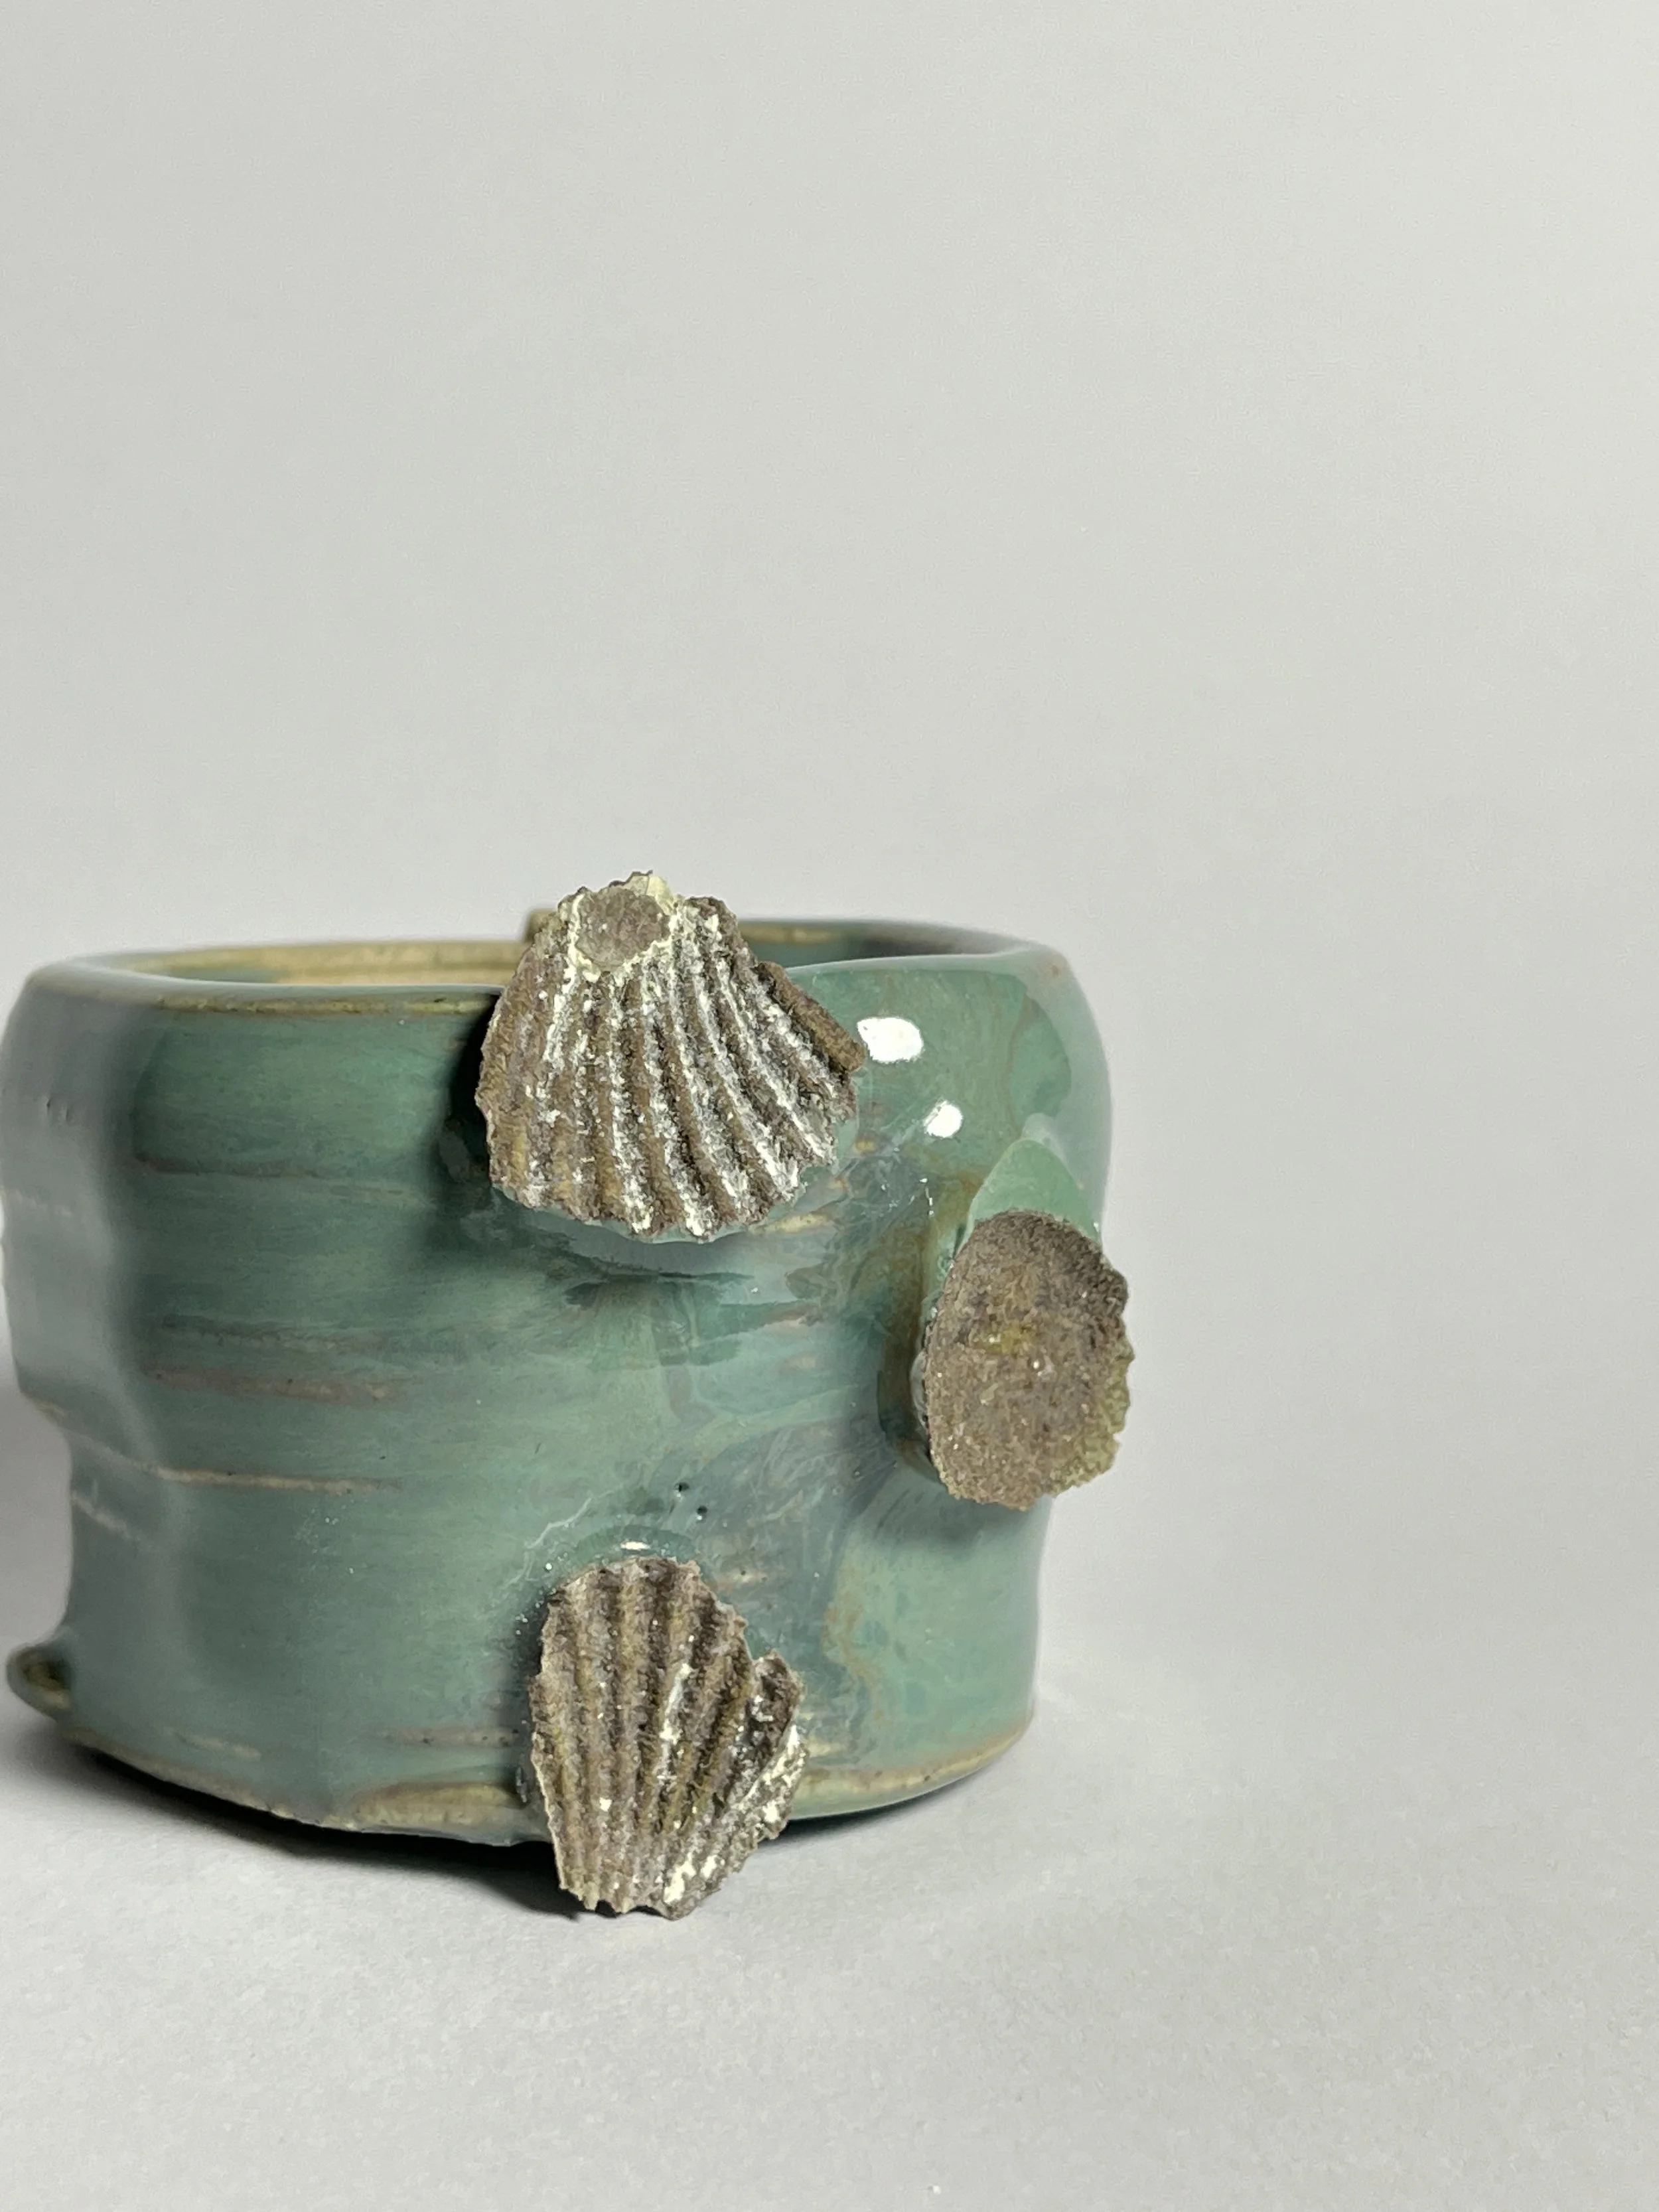
Figure 14,15. Hero photography and close up shot of the texture left by the seashell stilts [Photograph]. Note. Photographed by author
Upon reflection of my practice this week, I am starting to understand and put into practice what I had learnt earlier from Citta about material storytelling. The research and understanding of the material guided my making and naturally informed the expression of the story. If I continue with the shells as pottery stilts, for example, I could see my product restoring this history and being an avenue for conversation.
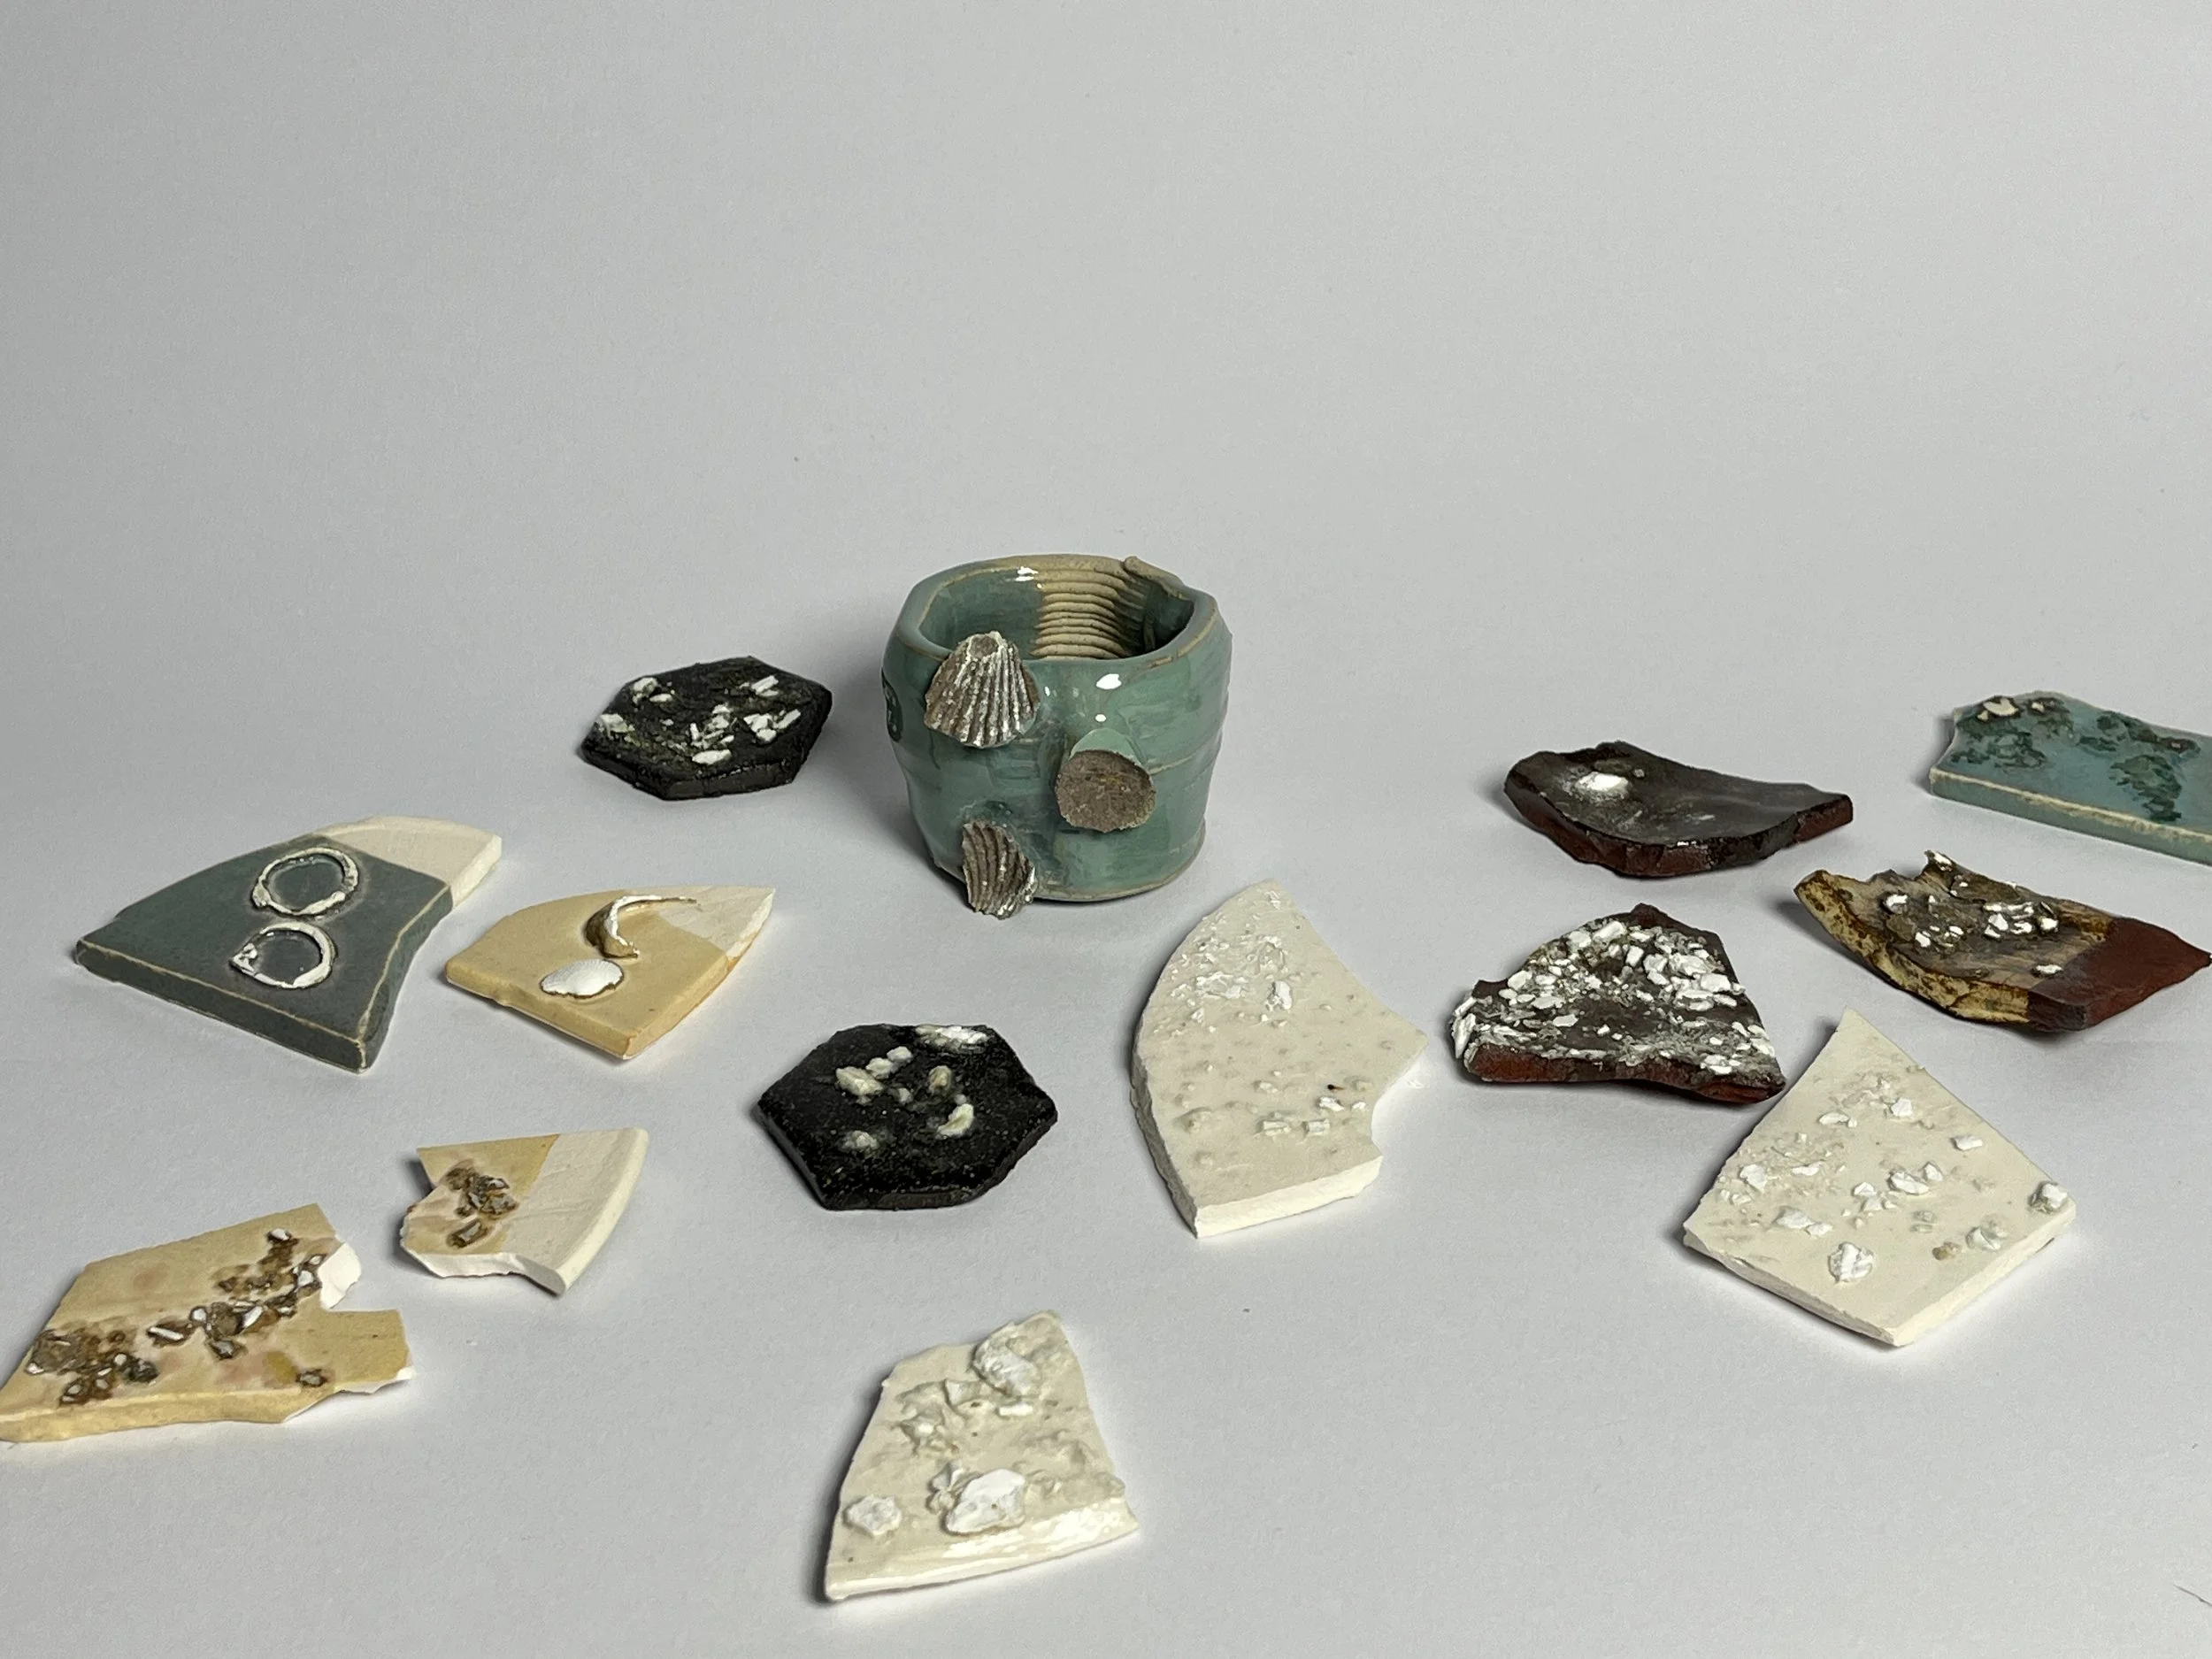
Figure 16. Hero photography of all the ceramic glaze samples together [Photograph]. Note. Photographed by author.
Meeting with Citta
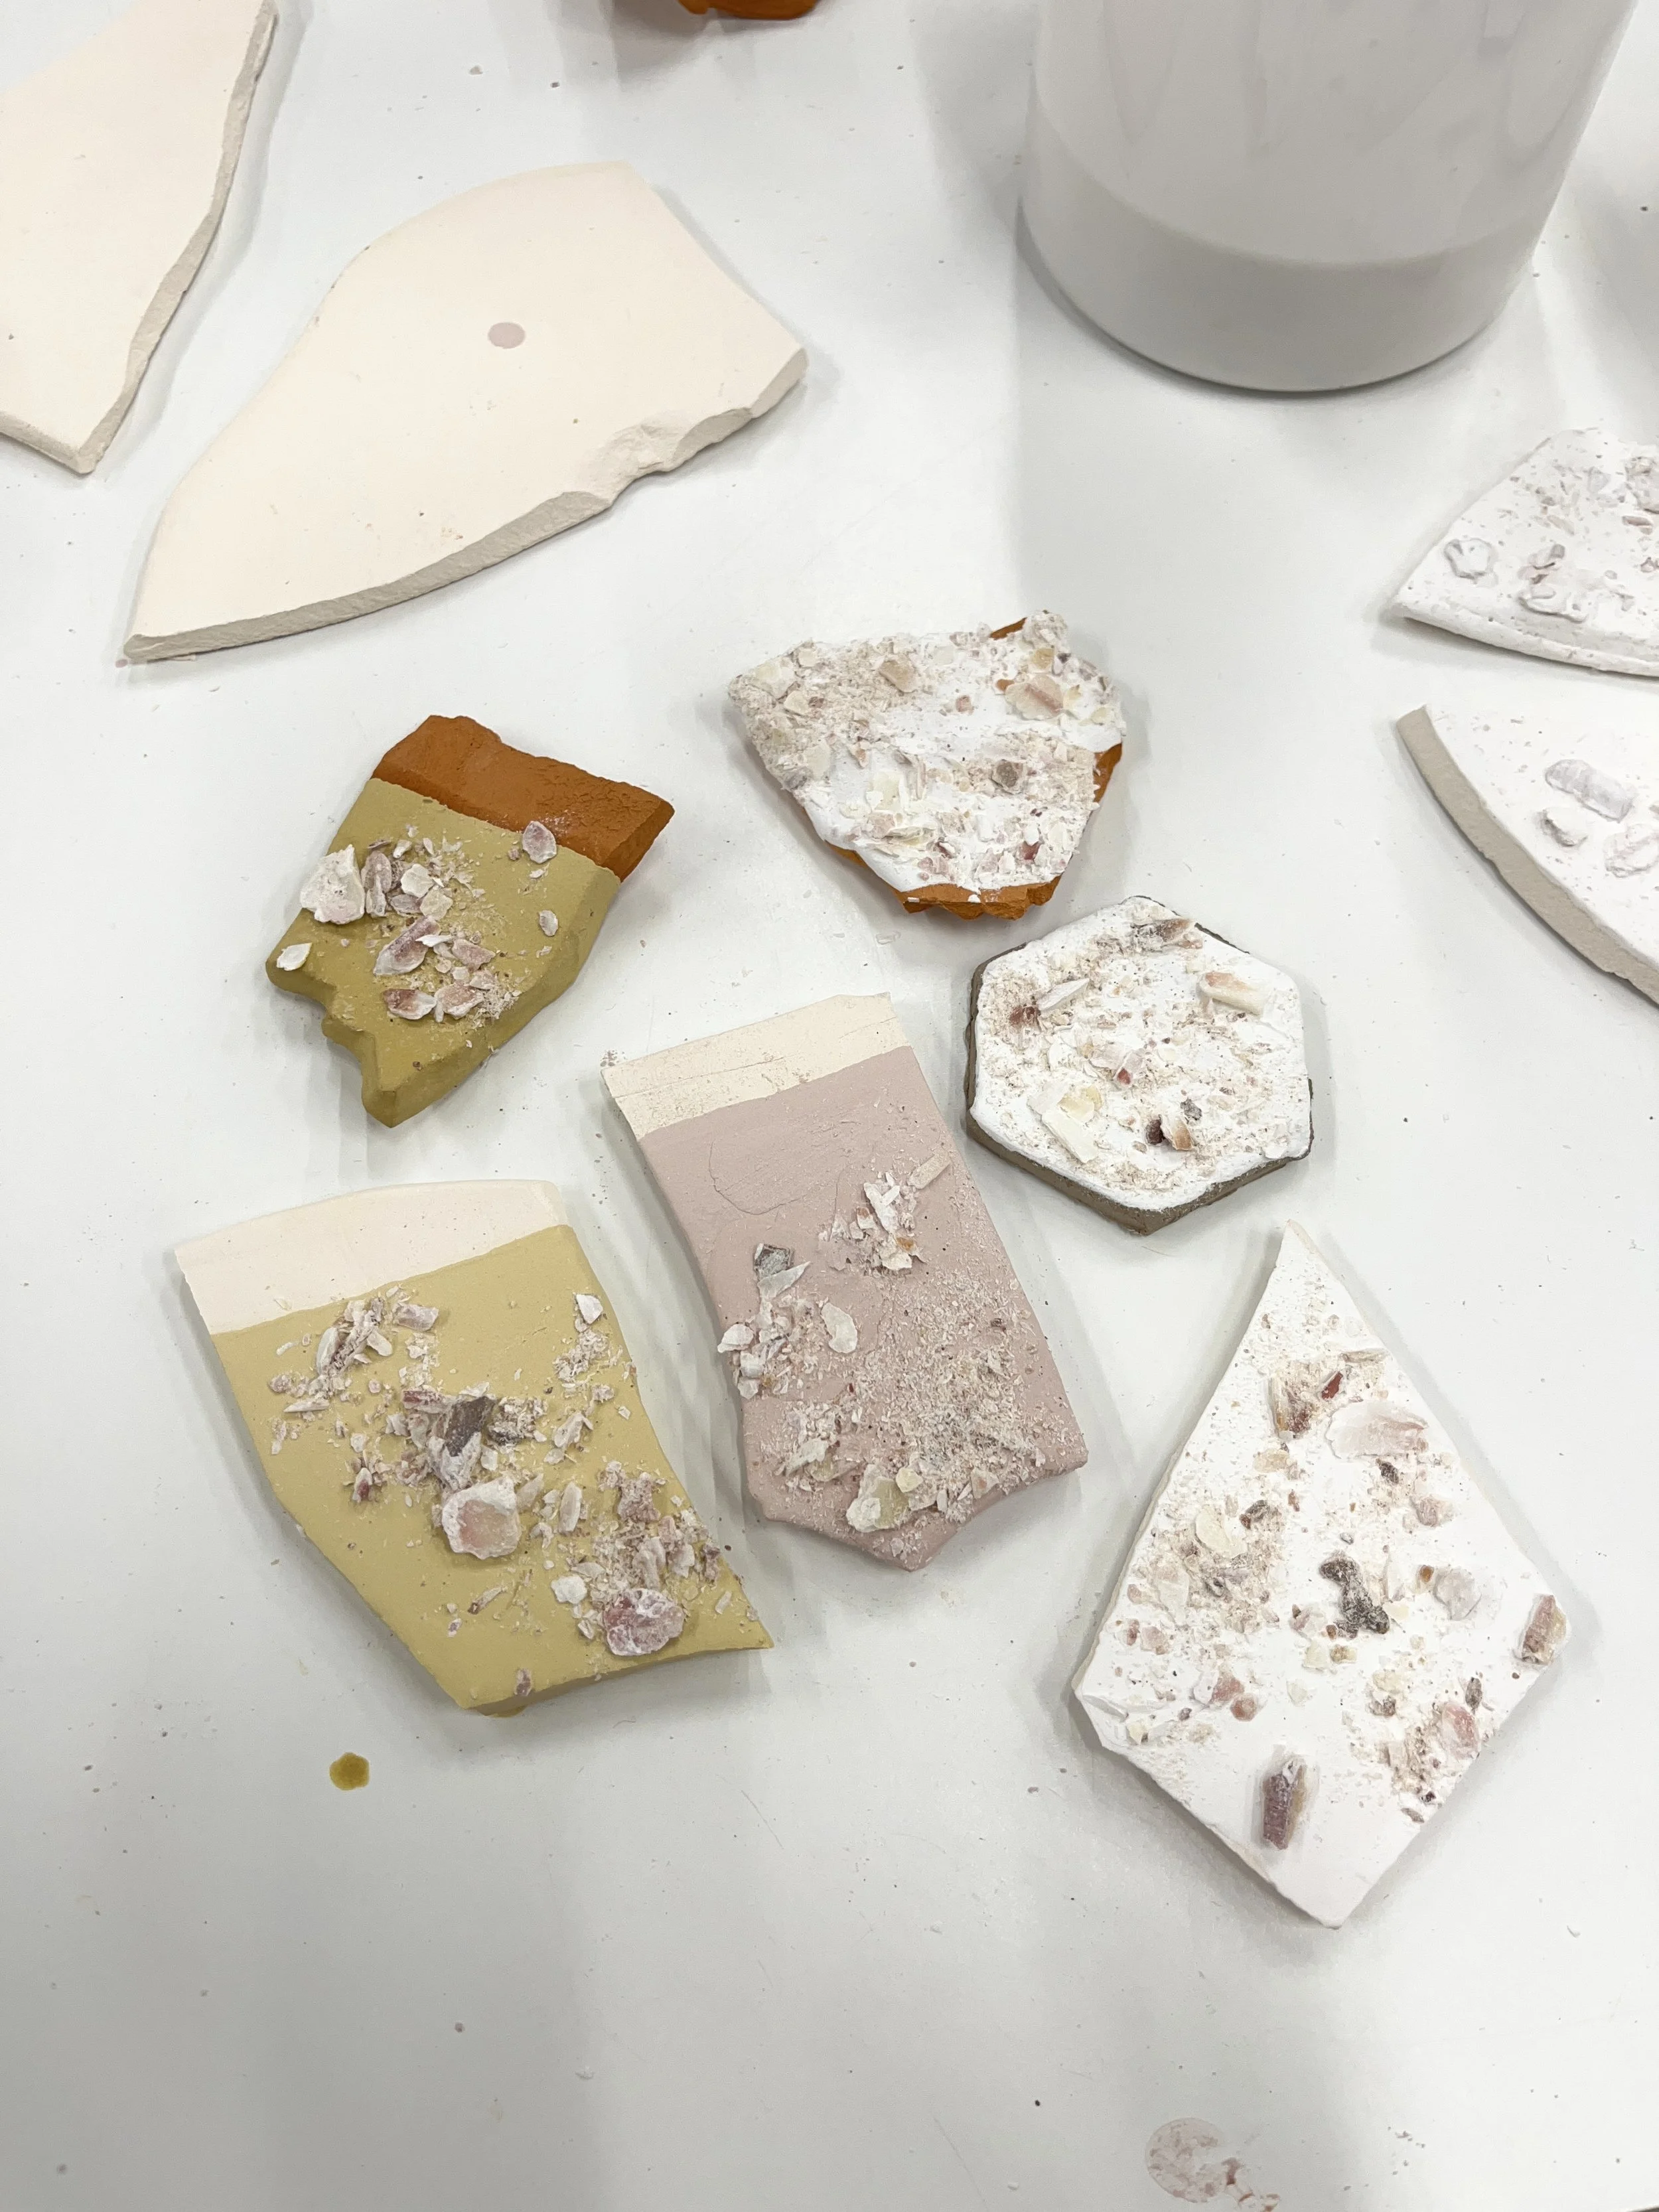
Figure 16. Ceramic glaze samples before firing [Photograph]. Note. Photographed by author
This week I was excited to show my progress in, putting our material storytelling discussion into practice. Unfortunately, the samples were not ready to be collected out of the kiln yet, but I was still able to explain my thinking through photographs. Haydn and I discusses the use and position of concrete in product design, and I was suggested to research aggregates next.
250 word abstract
Draft abstract for the proof-of-concept stage. Key contexts are highlighted in bold.
Here in Aotearoa, we hold the privilege of sitting far from the centres of mass production and global manufacturing. It allows us to think differently by looking inward, to recognise the richness that already exists within our landscapes and coastlines. Even within our small country, we have an abundance of material and knowledge. So rather than chasing something new, I want to recognise the significance of what we already have, particularly with underutilised or wasted materials.
Kina, the New Zealand sea urchin, is loved by locals as food, yet in the ocean, it is often labelled a pest. When its shells are improperly discarded, they become harmful to both people and the environment. But this byproduct still holds so much potential in its intricate form. I want to reveal the life that continues after consumption of these Kina and tell this story through the products in people’s homes. I am approaching homeware design through a series of material explorations, by investigating the properties of Kina and its potential applications.
Early experiments reveal promise, and existing research on other sea urchins suggests transferable qualities, such as the strength of their calcium-rich shells, for potential natural dye extraction. These scientific characteristics have been studied but have yet to be considered in product design.
By working closely with this undervalued material, I hope to uncover new uses that allow its story to live within everyday objects. Placed in Kiwi homes, these products can quietly spark conversation and raise awareness about resource scarcity and responsibility.
Reference list
Hall-Hough, I. (n.d.). Effective Side Firing. Ceramic Arts Network. Retrieved May 24, 2026, from https://ceramicartsnetwork.org/ceramic-recipes/recipe/Effective-Side-Firing
NIWA. (2025, February 18). Kina. NIWA. https://niwa.co.nz/taonga-species/taonga-species-series/kina
Woods Hole Oceanographic Institution. (n.d.). How are seashells made? - Woods Hole Oceanographic Institution. How Are Seashells Made? Retrieved May 22, 2026, from https://www.whoi.edu/ocean-learning-hub/ocean-facts/how-are-seashells-made/